
iBooks Author
By Ken Roberts
Posted on 2013-10-03
One of Apple’s more recent releases may cause problems in your classroom: You and your students will be fighting over it to see who can create the splashiest electronic books! Given Apple’s remarkable success with its iPad, the company has moved even further into the education market with electronic books that can be read on these popular devices— and now, anyone can “write” books for the iPad, which can exploit the tablet’s many multimedia and sense-jarring capabilities. Apple’s iBooks Author application (app) is a free piece of software that allows you to create multi-touch textbooks that use, among many other things, video, interactive photo galleries, voiceovers, diagrams and tables, and 3-D objects. You will have to author your book on a Mac computer loaded with the appropriate operating system; however, you can then download your creation to any or all of the iPads in your school that have the most recent version of iBooks (currently 3.0) installed.
Using this combination of tools to create books about science topics or lab exercises, you or your student can develop digital books that others can load onto their own devices for studying and sharing. You can also project the books during lessons year after year or offer them to parents to help their children do homework exercises. While these books are likely to be the hit of the school, they can only be enjoyed on an iPad (and not other electronic readers), and they won’t play on iPods or iPhones. Beyond these limitations, you and your students are likely to view yourselves as combinations of Ernest Hemingway, Lady Gaga, and Steven Spielberg! Since Apple’s motive for this development is to join the growing business of electronic textbook development, textbooks created by iBooks Author may only be sold if they are accepted and distributed by Apple; however, teachers have a more realistic option of releasing their work locally and without any paperwork if the book is distributed for free. This means that you can join the party now, sidestepping issues of cost and copyright contracts while keeping all of the creative energies in your school building. To leap into this exciting fray, your Mac operating system needs to be OS X 10.6.6 or higher. You can then download the latest version of the Apple iBooks Author app (currently version 2.0) for free from the Apple store.
To begin a project, you are likely going to want to create your text before you start designing the book in iBooks Author; given that you simply “pour” text into the various portions of your book, you will also want your chosen visuals and other interactive elements to be ready to use. Similarly, if you want to insert a series of photos or one or more slide-show presentations, these should be created in advance. Your work area will appear much like the one shown in Figure 1.

If you are familiar with Mac iWorks, Apple’s productivity suite, you will feel right at home using iBooks Author. As with other iWorks programs, you begin with a choice of six templates, from which you can create attractively formatted e-books, or you can generate your own. To create simple books, either the Basic template or the Modern Type template will serve you well. However, for a richer array of design features, iBooks Author offers three templates, Editorial, Contemporary, and Craft, all of which include several opportunities for including photos or visual images that add a “wow” factor to your book. Alternatively, you can create your own custom template, which could include your school’s signature layout; that template can then be used in the future if you or your colleagues want to publish more books. After selecting your template, you can begin the fun work of filling in the pages with the text that you or your students have created for this purpose. It is as simple as clicking and pasting.
With that task complete, you will see the menu bar, which allows you to manipulate the text and add electronic text features such as callouts, shapes, and even data tables and charts from your lab exercises (see Figure 2).
You will soon discover how the software accommodates your insertions by flowing text around each addition. These additions can include photos, some of which fit neatly into template holding points, or you can drag and drop them into any location you choose. You are likely to find yourself experimenting with all sorts of variations in appearance; the changes are all done on the fly as your whim dictates. In no time, you will find your chapter taking shape, and you can then use the Add Pages feature to create a new chapter or section in the book.
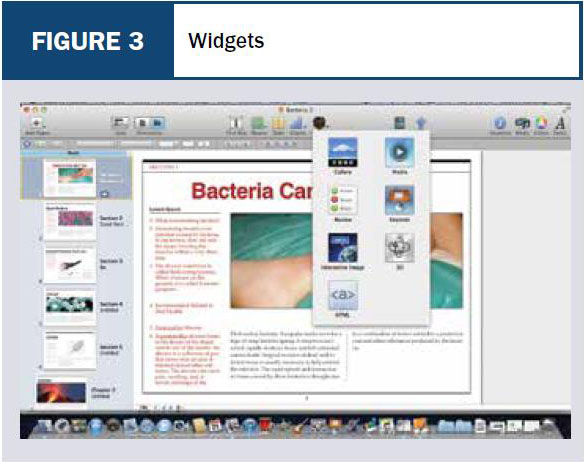
The glitzy elements of your creation are likely to come from the Widgets feature, which brings even greater interactivity and visual splash to the reading experience. Widgets allows you to create energy-charged elements within the book, using the following star performers: Gallery, Media, Review, Keynote, Interactive Image, 3-D, and HTML (see Figure 3).
For example, if you have developed your own photo collections related to particular teaching units, you can use the Gallery option to insert a series of photographs that readers navigate by using their fingers to sweep through the image sequence, each with its own caption; for the student, the experience is much like viewing a photo album. Similarly, videos and YouTube clips, as well as audio clips, can be included in your book by using the Media widget, which can provide an option for students who require a scaffold to their reading experience. The only caveat here is that you must be sure that the videos are first converted into Apple’s preferred formats of M4V for video and M4A for audio (which can be done in iTunes). Using another Widget option, you can insert an entire slide presentation imported directly from Apple’s Keynote program, and your readers can move through each of the slides at their own pace as an optional part of their reading.
Two other Widgets that are particularly powerful for enticing young readers are the Interactive Image and the 3-D options. The Interactive Image feature enables you to produce “zoomable” visual images, which readers touch to zoom in for inspection at closer range. This same feature allows you to add labeled points to the image so that the reader can tap a label to view its complete description; a label can be made as large as you wish to make it, and it is easy to navigate from label to label. These capabilities are the dream of a frustrated teacher of lab activities.
Additionally, if you feel that a 2-D image is insufficient to convey your point, you can include a 3-D image that the reader will be able to rotate in various directions. To use the 3-D widget tool, you must have access to 3-D images. The SketchUp 3-D Warehouse (www. sketchup.com/products/3D-warehouse) is a great online archive of free 3-D images that you can insert into your new iBook. Once you have located the image you want to use, you’ll need to save the file in the COLLADADAE format using the drop-down “Download Image” menu. Once saved, the image is ready to be imported into your iBook. You can monitor your progress as you build your book by having your iPad connected to your Mac with the usual iPad USB connector cable. To double-check the appearance of your book on the iPad as you work on the Mac, click on the Preview button. When you have completed your masterpiece, you can hand off the finished product to the iPad. Similarly, you can pass your book to other students’ iPads through iTunes. Additionally, for those students who do not have an iPad, you can give your manuscript to them by creating a PDF version; however, the interactivity will be lost with this last option.
Your teacher’s instinct will appreciate that the good news continues when students are viewing your work on the iPad itself; there are additional academically useful options built into iBooks, Apple’s electronic reader app. For example, students can access an array of options that appear when they tap on a word: Define, Highlight, Note, or Search. The Define feature gives students the definition of a word as well as option to search the web or Wikipedia for a more detailed explanation. The Highlight feature allows students to highlight important terms or concepts using a variety of colors as they read, and just as students might like to use sticky notes as they read paper books, the Note option gives students the ability to jot down ideas or questions. Once notes are added, the text is marked with a small sticky note in the margin and the notes are saved for future reference. Finally, should students need to find a particular term or phrase, they can use the Search feature to zip through the book, including the media sections, for places where it appears. Taking it as a given that teachers would need to concern themselves with testing their students’ understanding of what they have read, the Apple designers have included another widget that allows you to insert a quiz anywhere in your creation. Called a Review, this option allows you to enter multiple-choice questions anywhere in the body of the text; by clicking on this icon, a box containing the multiple-choice quiz is inserted at a point of your choosing. If you like, you can have the quiz expand to a full-screen view. You write the question, create the answer options, and then select the correct answer, and you can create as many questions as you like. Note that you can also create variations that science teachers will love: questions can be built around an inserted image (of lab slides, for example), and questions can be crafted around the task of labeling specific points in an image (of zygotes, for example). A summary of students’ correct responses is provided onscreen.
The sale of iPads continues to soar at an astonishing rate, and Apple has become an enormous market force. Not only are lots of families buying iPads, approximately 1.5 million of the devices are estimated to be in use in schools today. Clearly, Apple is envisioning a much wider use of electronic texts in schools, but it also has its eye on establishing a place in the textbook market with less expensive, more feature-rich textbooks. And you can have a piece of the action! Imagine students studying from books that they and you have created together, and imagine the collection of electronic textbooks that you can develop for subsequent years’ students.
Disclaimer: The views expressed in this blog post are those of the author(s) and do not necessarily reflect the official position of the National Science Teaching Association (NSTA).