
Interactive science notebooks
By Mary Bigelow
Posted on 2015-08-05
Teachers often have questions about interactive science notebooks, especially at the secondary level. Mary Morgan, a high school science teacher from Belton High School in Belton, Texas, shares her experiences (These ideas refer to traditional formats. Ms Morgan will share her thoughts on electronic notebooks in a future blog.)
Ms. Mentor: How are interactive science notebooks different from the traditional idea of notebooks as a collection of handouts, lab reports, and notes copied from the board and organized in a way determined by the teacher?

Mary Morgan
Ms. Morgan: The “interactivity” of interactive notebooks comes from the fact that students are working with the information in various ways as they fill in the notebook. Usually this starts with taking Cornell notes on a topic on the right side, whether during a direct teach session, from a video or the textbook, or during a web-quest. Then the students use the left side of the notebook to process the information from the notes. Working with, and often times, struggling with, the new information is a crucial piece for learning. The processing leads students to take ownership of the information. The processing methods vary, but processing always require the students to interact with the new information in some form leading to understanding and owning the information.
Ms. Mentor: Are interactive notebooks appropriate for high school? How do students respond to them?
Ms. Morgan: I have used INBs (Interactive Notebooks) for the last eight of the nine years I’ve been teaching. I have used them for inclusion (low level learners), on-level, and pre-AP Biology; on-level and Honors Anatomy; and physiology; zoology; and AP Biology. My students complain at first every year, but by the time the end-of-course (EOC) exams roll around in May, they thank me for doing the notebooks because they are organized and easy to study!
Ms. Mentor: Do you get any feedback from parents?
 Ms. Morgan: The feedback from parents is usually similar to students at first. They usually have some trepidation as this is new for many parents as well. Some will ask why we are doing a middle school notebook or how we are covering all the information in a small space. Some parents also have concerns about how we grade the notebook. However, once I sit with the parents in a one-on-one conference, show them completed notebooks from prior years, explain how the notebook organizes the information and helps students study for unit tests, and creates an EOC review guide throughout the year, most parents are on-board with the INBs. By the end of the year, the parents I speak with comment about how great the INBs are and they wish other teachers would do them as well. I am planning a parent/guardian/trusted adult check-off sheet to encourage parents and guardians to be more hands on with their students’ work and study habits.
Ms. Mentor: Teachers have different ideas about the format of the notebook: composition books, spiral books, binders, pocket folders. Is there a “best” format to use?
Ms. Morgan: I use composition notebooks. They are a little pricier than spirals, but they hold together all year long and the pages being harder to remove. I make it quite clear to the students that no pages are to be ripped out ever! (I offer notebook paper to those who need it if someone at home is tempted to tear a page out. This has been an issue with some students in the past.) For students who can’t afford a notebook, I will quietly give them one I purchased.
Ms. Mentor: It seems that student ownership in the document would be essential. What opportunities do you provide for student input?
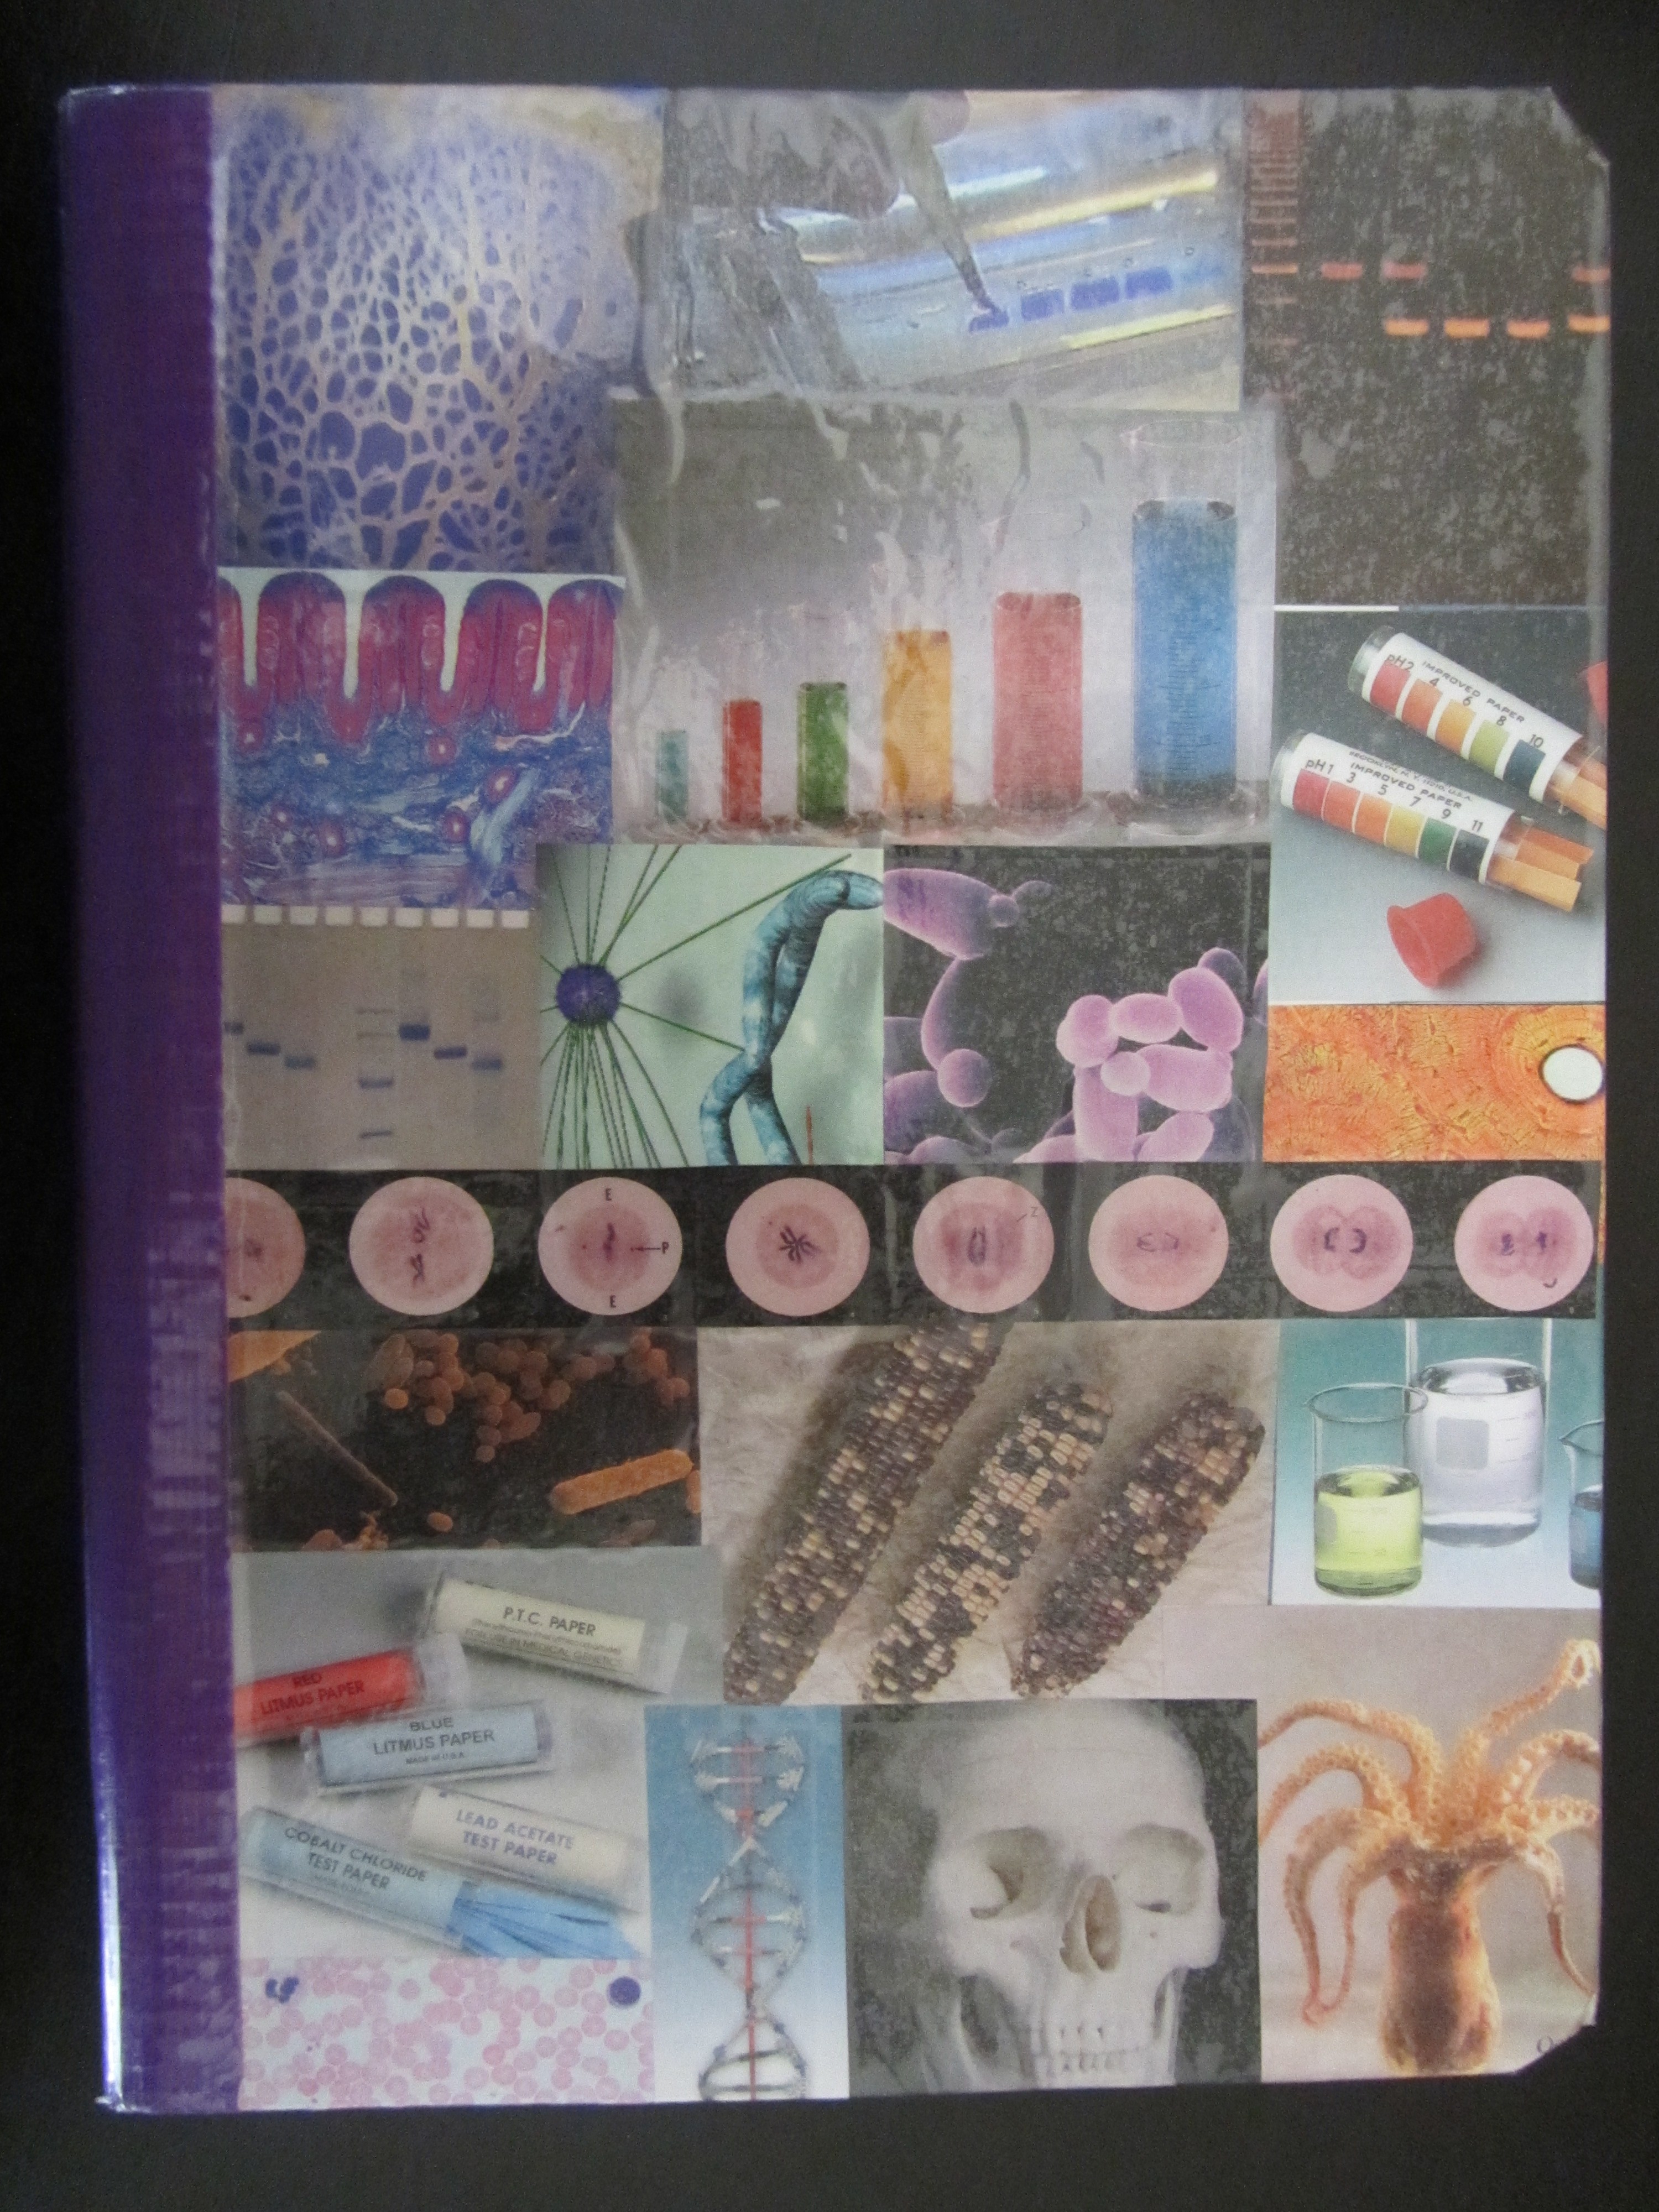
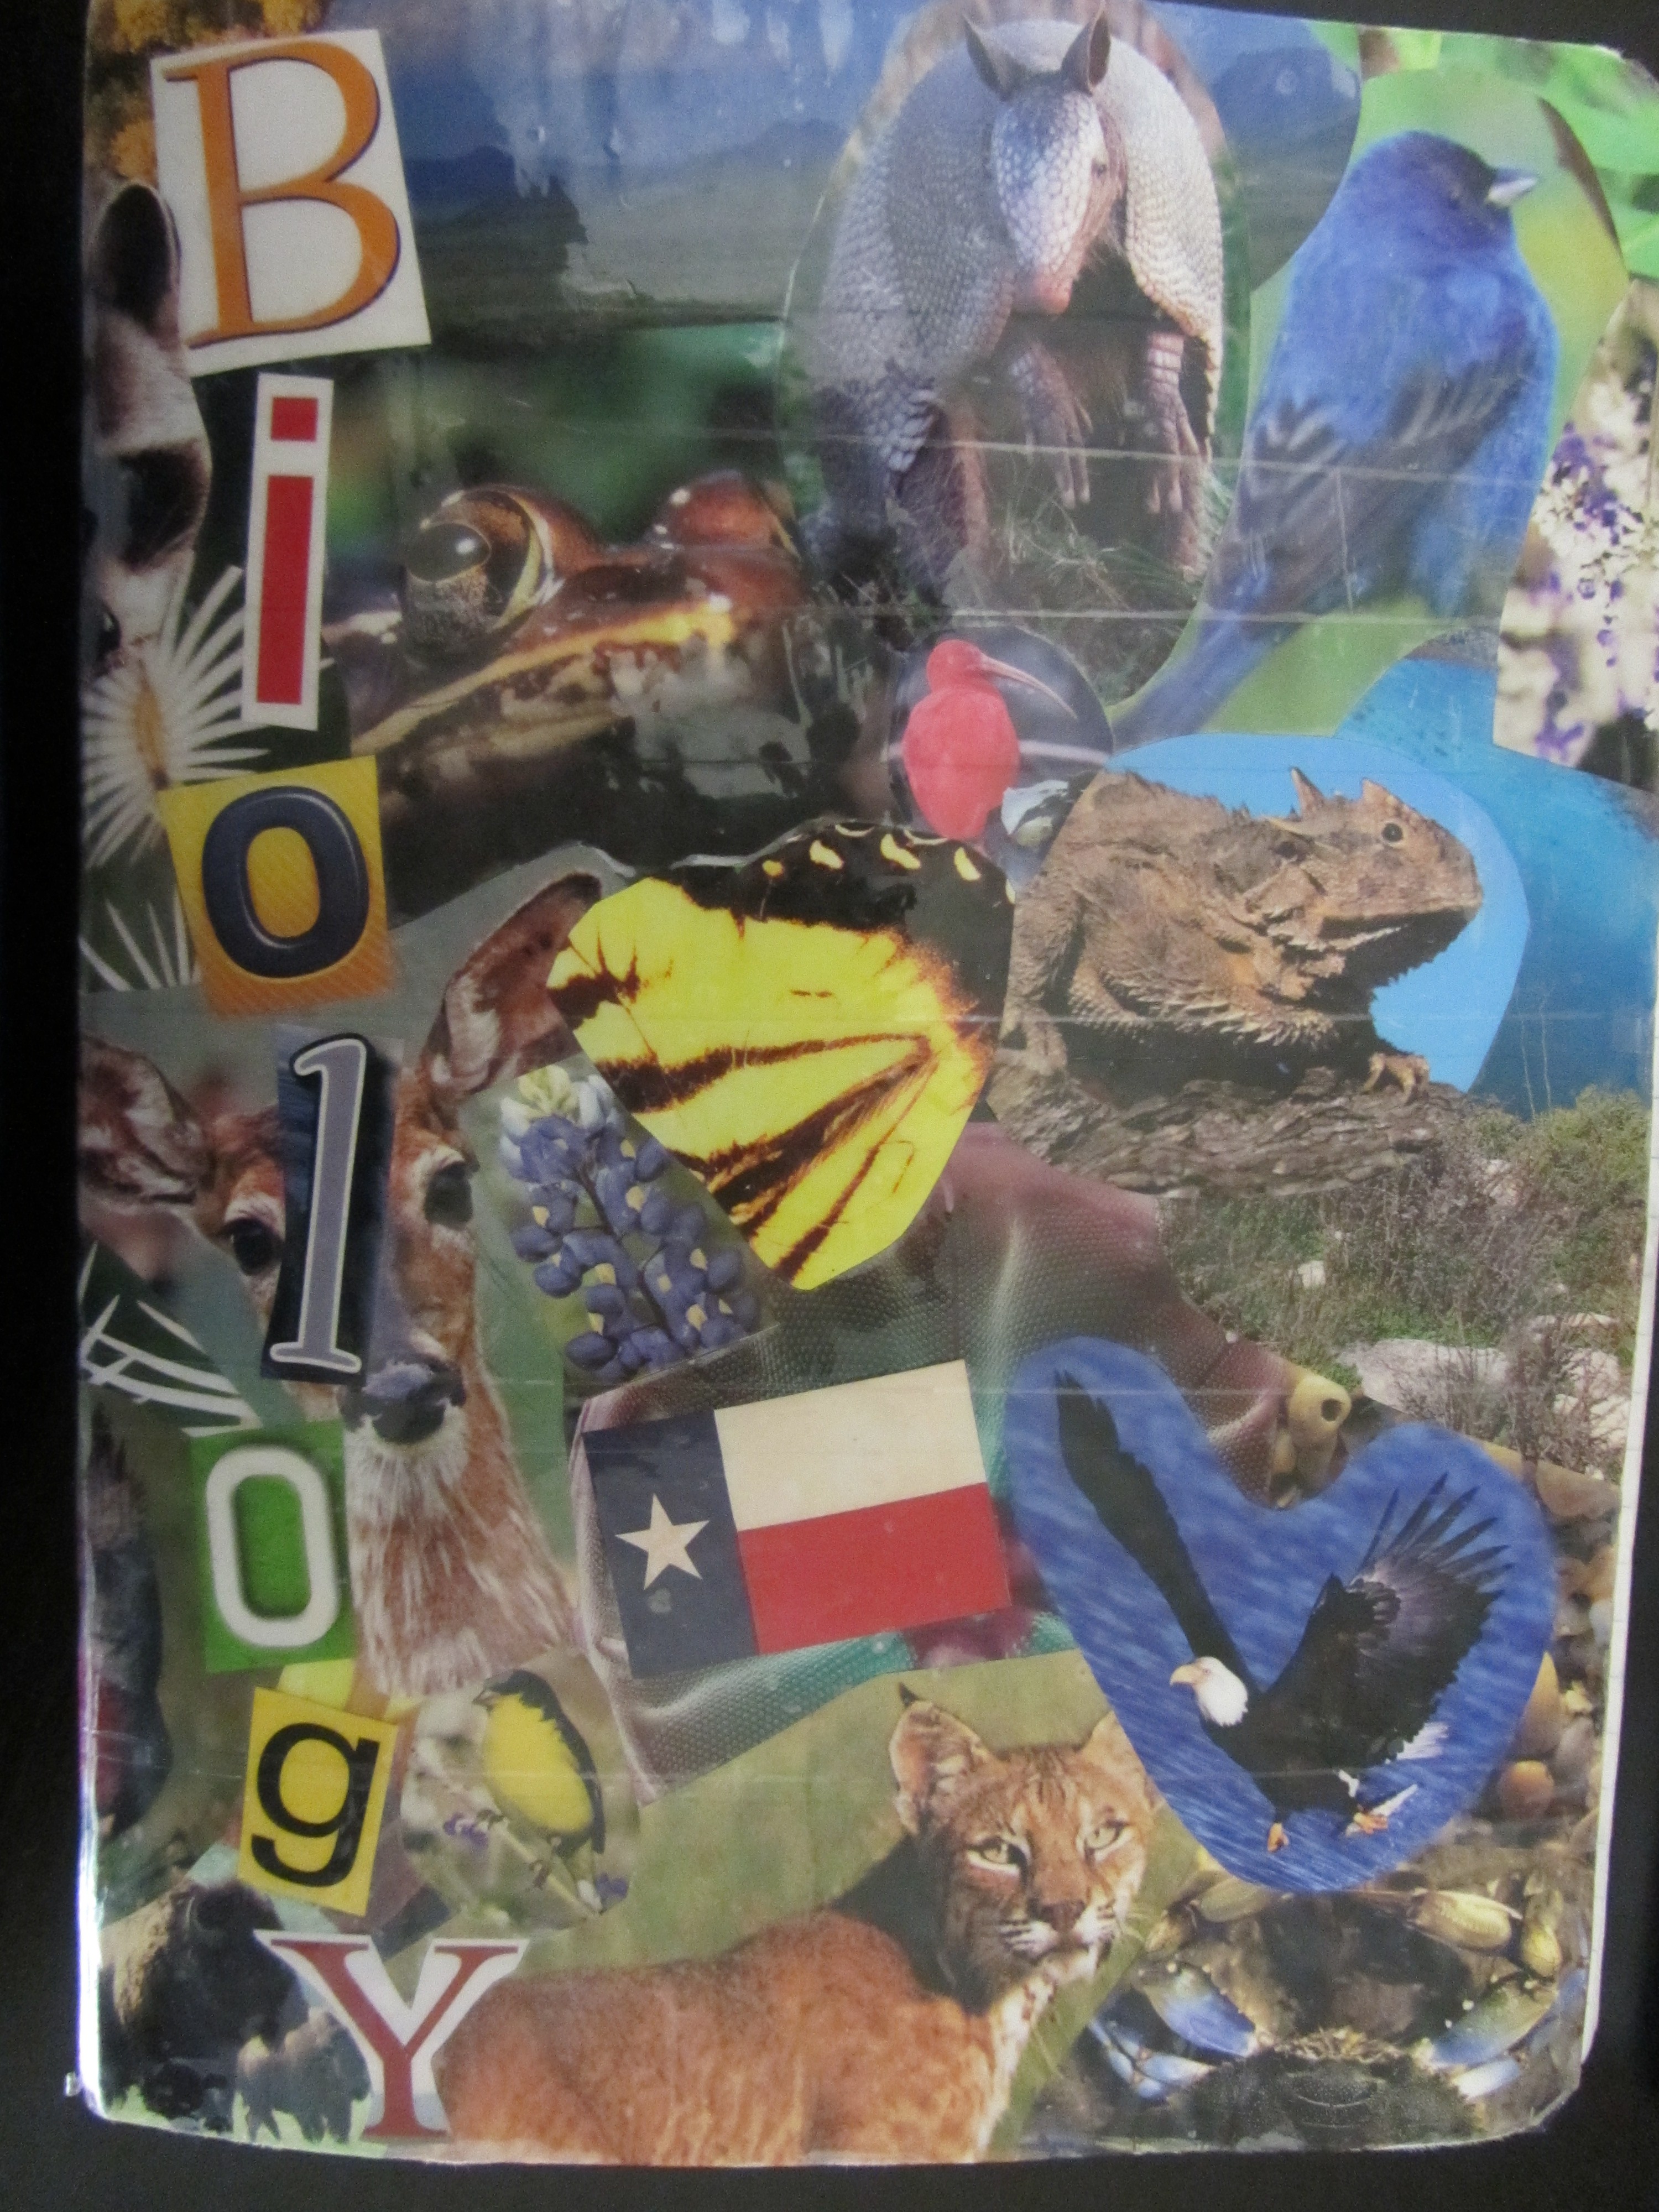 Ms. Morgan: I use a combination of personalization and consistent formatting. I have my students decorate the front of their notebooks using old magazine photos. (I tell them anything I deem inappropriate will be ripped off, so that usually solves that problem.) I encourage them to use a mix of science pictures and personal likes. We cover the fronts with clear contact paper. I then apply colored duct tape to the spine which helps the notebooks hold together better all year long and allows me to color code notebooks by class period.
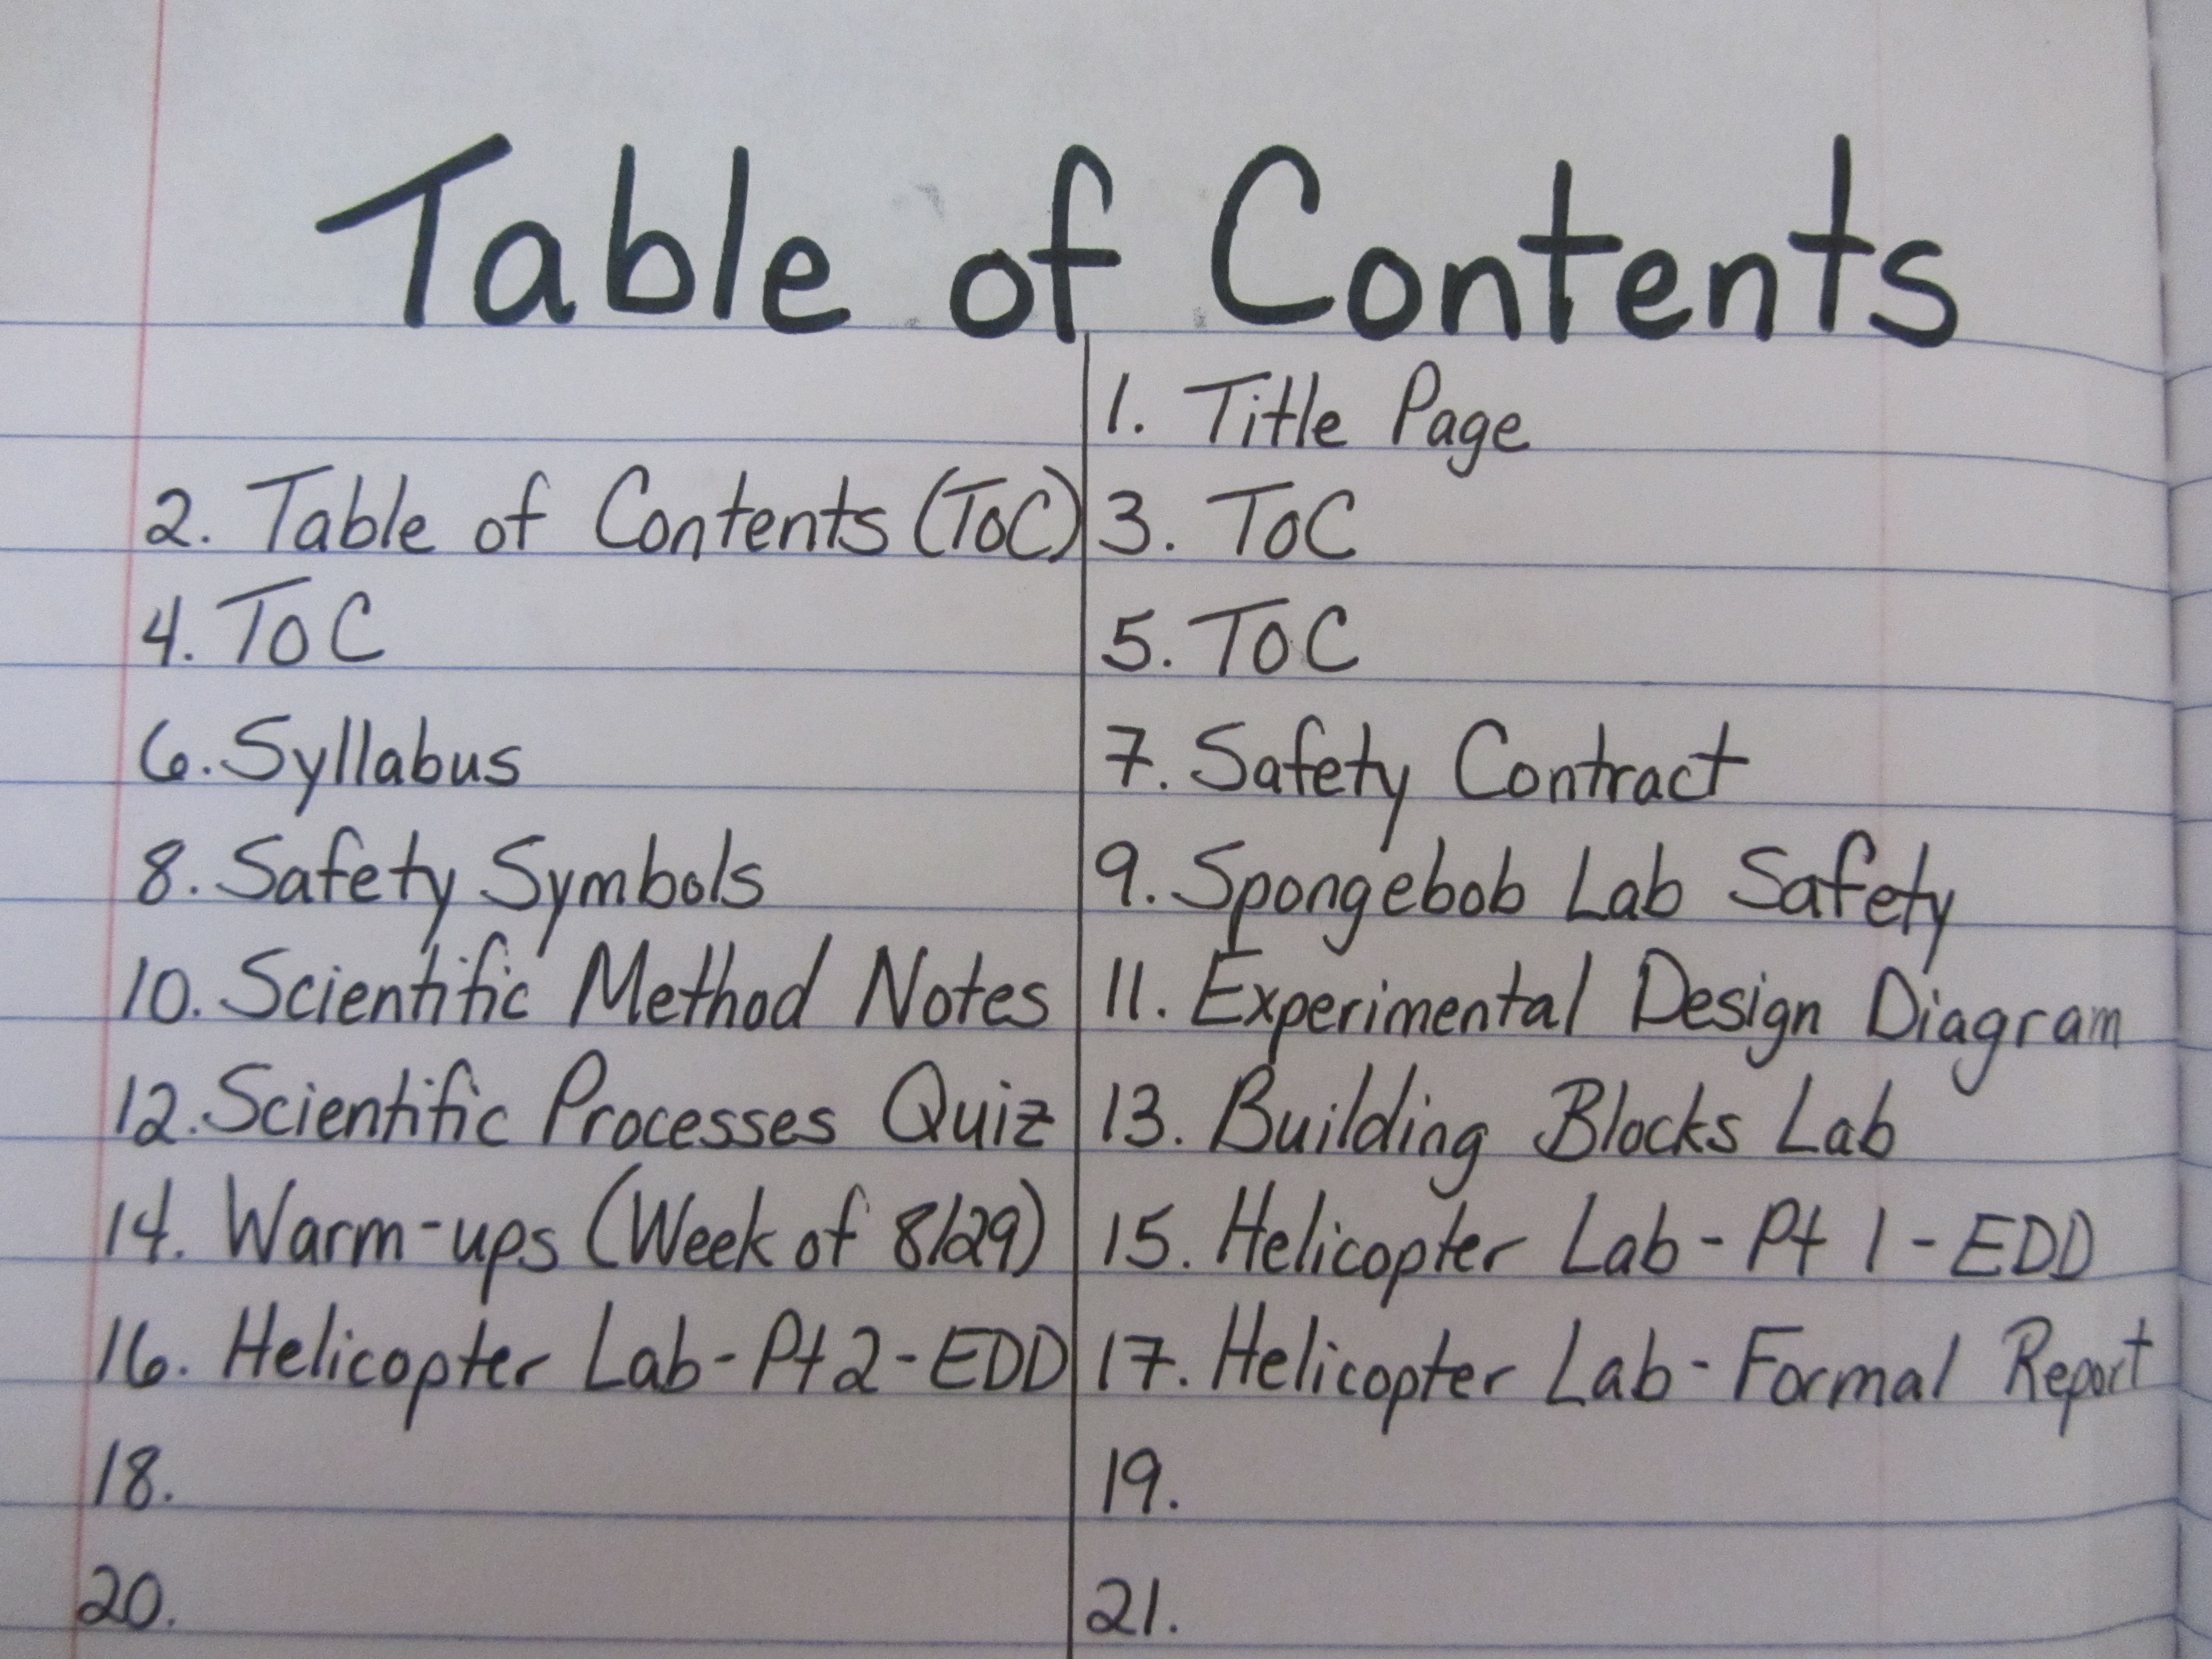 I have students create a title page and a table of contents, and they number ALL of the pages. They also put an envelope in the inside back cover of each notebook to keep loose items (e.g., vocabulary cards, model pieces, cut-outs that haven’t been used yet). We also use colored masking tape to make tabs for each unit so students can quickly flip back and forth between old and new work. We also include flip-outs on the front and back covers which contain reference materials. These pages can be flipped out from the cover and viewed from any page in the notebook.
At the beginning of the school year, I show students tips and tricks for organizing the notebooks, but eventually most students develop their own organizing style for their notebook which is one type of ownership.
Ms. Mentor: The color coding is something I can appreciate, especially when I taught six sections! And the personalized cover would help students identify their notebook quickly. How do you handle having students add papers to the notebooks?
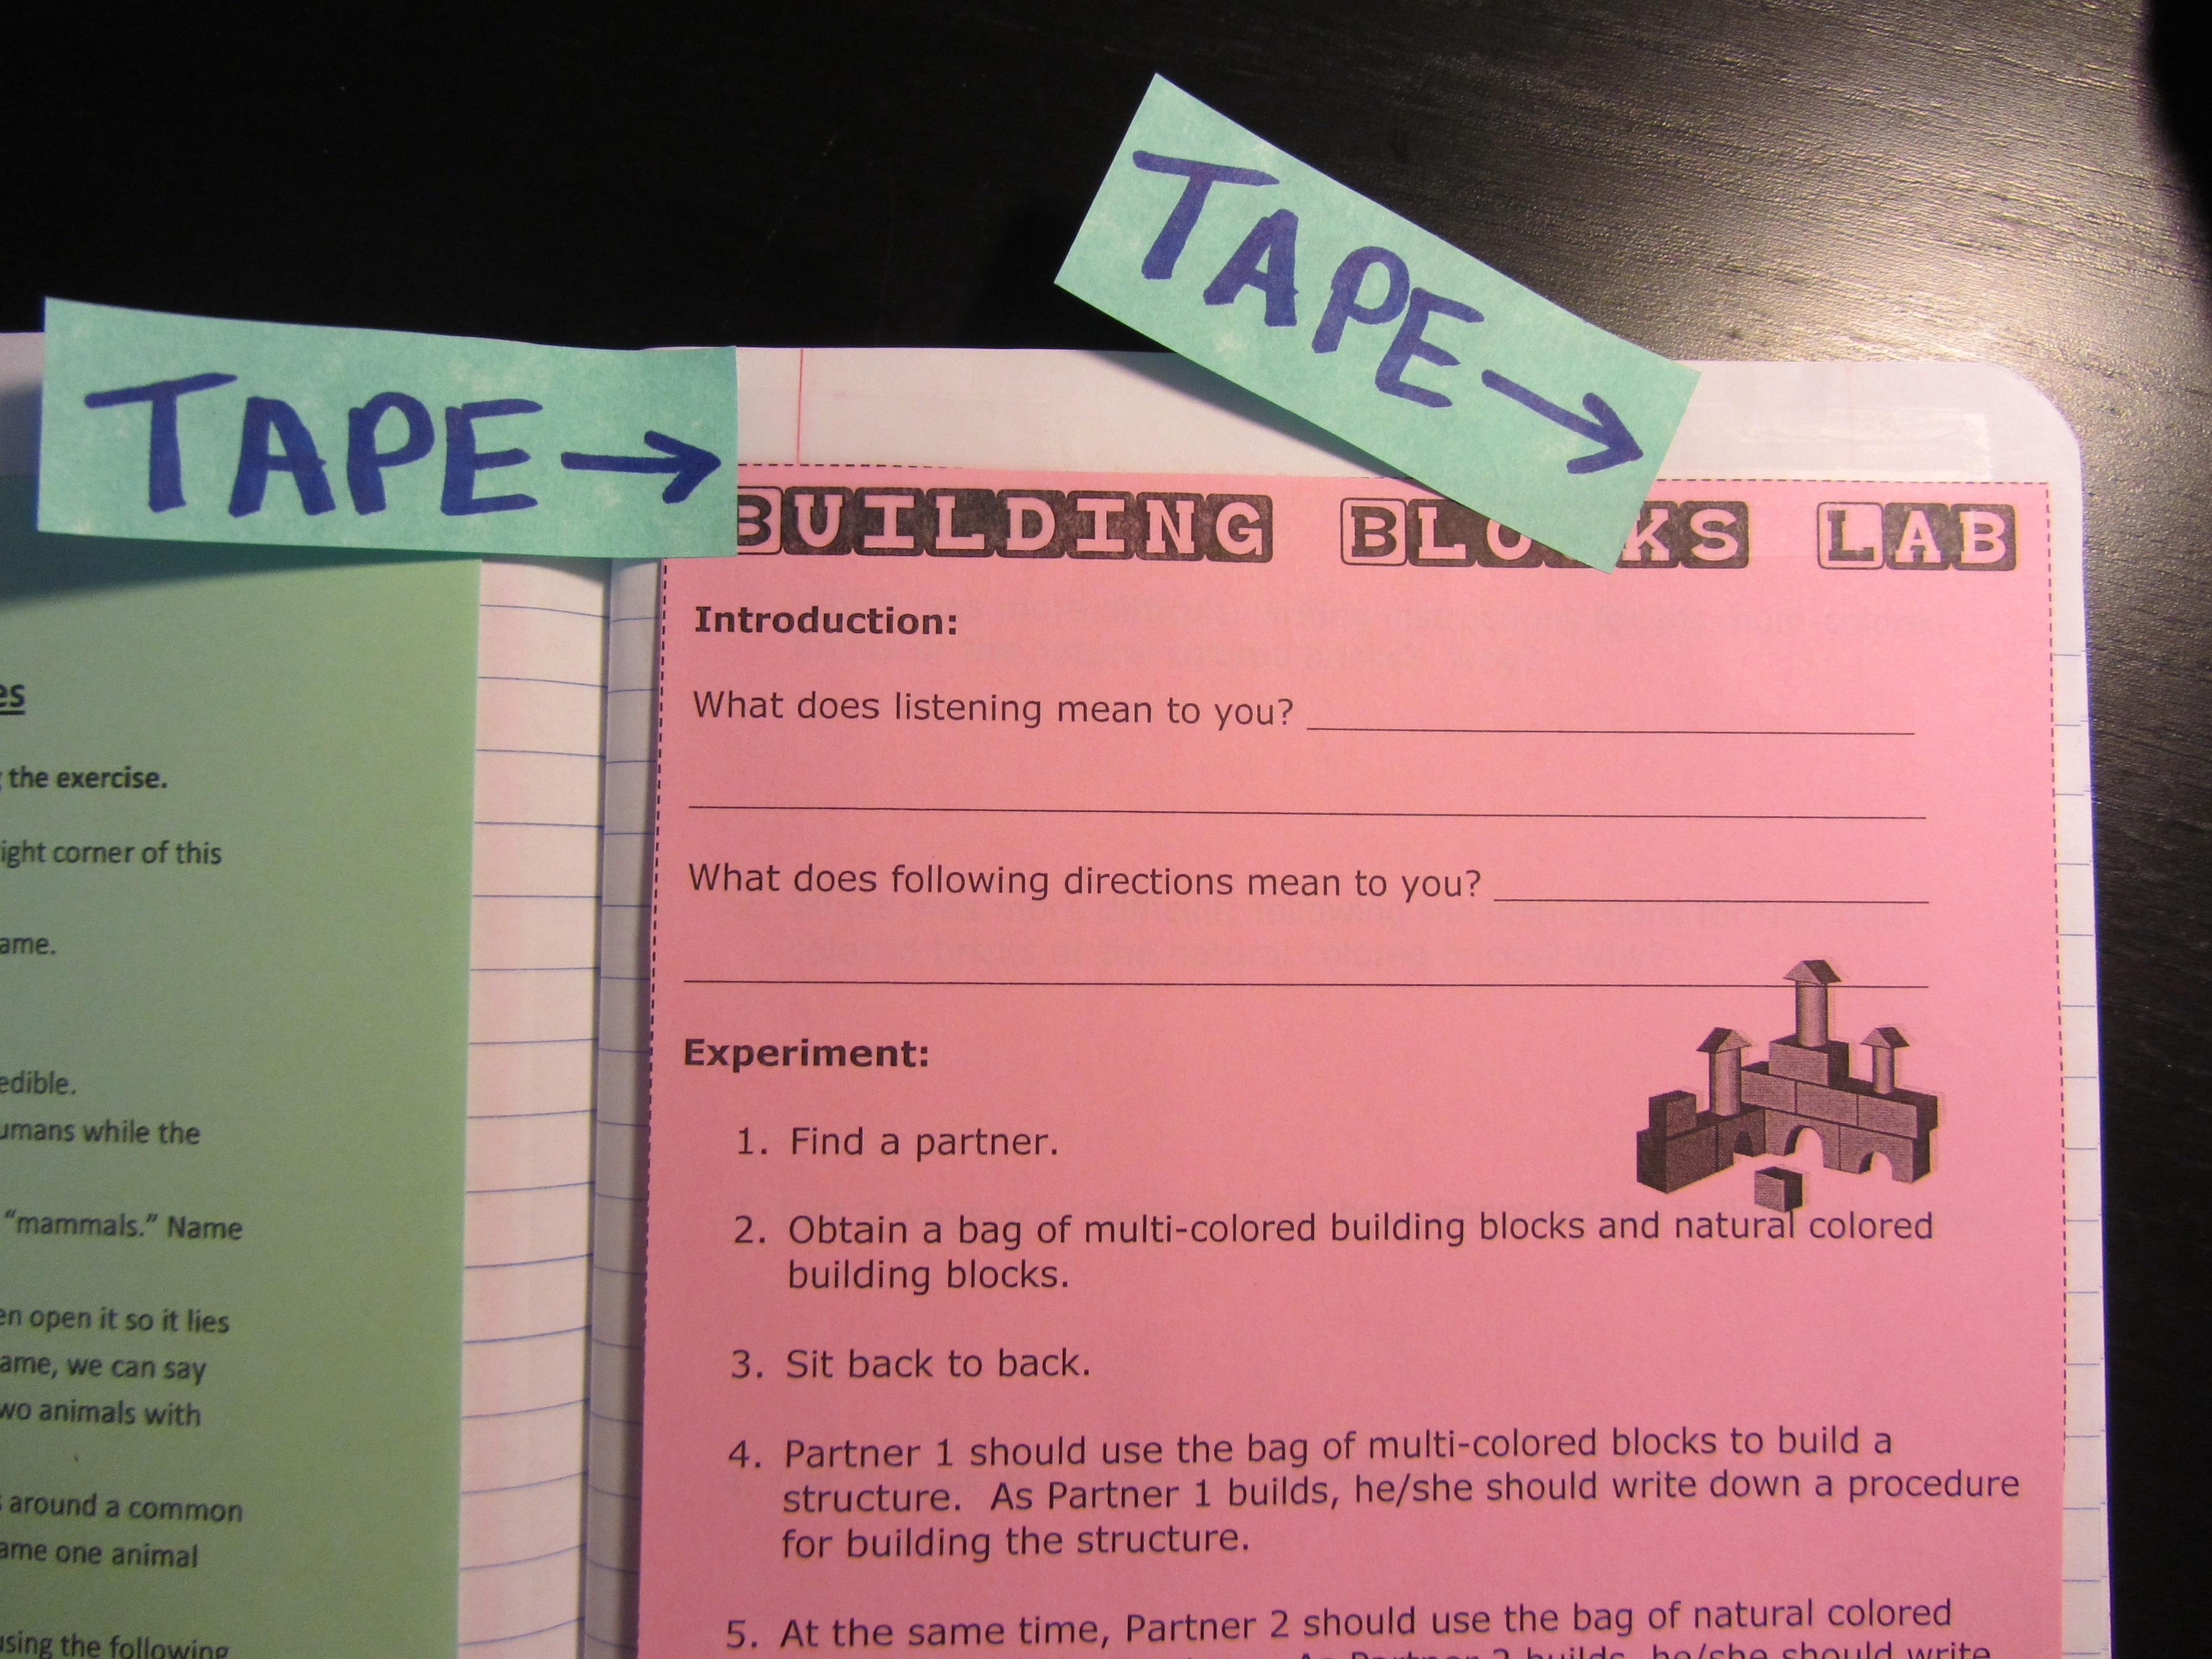
Ms. Morgan: I keep a supply bucket on each table with markers, tape, scissors, short rulers, and a separate bin for trash. I use dotted lines on everything to reduce cutting time, and we use mostly cellophane tape to put things in the notebook (Rarely we will glue with liquid glue, and we never use staples, glue sticks, or chewing gum!) All trash goes in the bin at the end of class; one of my table jobs is that “Number Ones” take out the trash.
Ms. Mentor: Getting to the “interactive part,” how do students organize their work during the class period?
 Ms. Morgan: I have done the notebooks multiple ways, but I now have settled into the AVID set-up for the right and left pages. Based on the AVID structure, right pages are teacher input/direct teaching pages: Cornell notes, teacher demos, Fold
ables (used as notes), the driving question, hypothesis, and lab data . Right pages have odd numbers on them for page numbers, so I tell the students they are my pages because I’m odd. Student output goes on the left, evenly numbered pages. This is a place for the student to process the right page information with pictures, colors, writing, etc. Some students will create a Foldable with the right-page information so that would go on the left side. Analysis (graphs, tables, statistics) and conclusions/reasoning go on this page for labs. If students do one-pagers for review, that would go on the left side.
Ms. Mentor: Do you evaluate the student notebooks? That could be an overwhelming task.
Ms. Morgan: It took me a while to come up with a system. Whatever you do, don’t try to grade them all at once! You’ll be at school for hours and hours. I like to grade one or two pages on test days and can usually get through a class’s notebooks during the period. I also do short checks during class (warm-up time, independent work time) and have students provide feedback to each other on their notebooks.
Having students do peer feedback requires them to understand and critically think about the information being presented and teaches them how to assess work and documents without bias. I’ve also seen students self-assess after going through the peer review process a few times and so they begin to create better work from the start. I have to teach my students how this process works and monitor them, especially the first few times, to ensure that constructive criticism does not become simply criticism. I have found that oftentimes they are harder on each other and themselves than I am.
Ms. Mentor: Do you have any other suggestions for someone just starting with interactive notebooks?
 Ms. Morgan: Do what works for you. Try something and if it doesn’t work after a couple of times, change it. Develop you own notebook vocabulary and your students will catch on. If you need every student on the same page, do it. If you are okay with students being on their own page, do it. For example, all of my students have to be on the page I tell them and I keep a class-wide table of contents on a big poster sheet of notebook paper. But don’t be bound by what works for someone else. Make the notebook work for your teaching style.
Anything you have done using other formats can [be adapted] to the notebook. For example, Foldables fit great in the notebook. Sometimes it requires a little different fold or a bit of extra trimming, but you can make it work. Old worksheets/notes can work by reducing the size on your copy machine and adding a dotted border for trimming. I also copy lots of things on half-pages because those fit great in the notebooks. I make notebook pages into pockets for brochures and other handouts. The sky is the limit with the notebooks!
Ms Mentor: I’ve put together a Resource Collection in the NSTA Learning Center on the topic of “Science Notebooks” with articles and websites that may be helpful.
Disclaimer: The views expressed in this blog post are those of the author(s) and do not necessarily reflect the official position of the National Science Teaching Association (NSTA).