
Making playdough is science
By Peggy Ashbrook
Posted on 2009-12-13
Making a dough for classroom play is also a time to teach vocabulary and math skills, and social skills such as cleaning up after oneself. Write the recipe on a page or easel paper to refer to even if your students are not yet reading. Illustrate with drawings or take photographs to use as illustrations the next time you make the play dough. Playdough is a soft, moldable flour dough that holds its shape.
What science skills will children learn while making playdough? How can making a material for play support developing math skills and language and literacy development? Here’s a beginning list; please add to it by posting a comment.
| Activity | Skills used or learned |
|---|---|
| Reading a recipe chart with both words and pictures | Teaches that print has a purpose. Is a time to use language. Teaches that symbols represent real things, such as the color blue is a symbol for water, and two pictures of a measuring spoon represents using two spoons of an ingredient. Teaches units of measurement. |
| Handling and talking about the properties of the materials (dry, wet, liquid, powdery, oily) | Teaches vocabulary. Experience with materials. |
| Following the steps of a procedure | Scientists follow procedures for safety, and to reproduce the results of a first try. The order in which materials are mixed may affect the product. Measuring exactly takes practice. Children can practice self control. |
| Mixing materials together | Mixing materials together can make a change—a material may get wet, clump together, or dissolve. |
| Heating the playdough mixture | Heat can transform materials into a material with new properties |
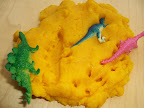
| Playing with the playdough | During play children use their imagination, practice social skills, develop language skills, continue to explore the properties of the new material, and express themselves artistically. |
Playdough is easy to make with children because there is some “wiggle room” in the amounts—a little more water will make a softer dough, a little less oil will make it a bit sticky. Recipes for playdoughs (a valuable classroom tool) are widely available online and in activity books. Here it is again!
If your very young children are unable to resist putting ingredients into their mouths, please wait 6 months or a few years before doing science recipes with them. Just as we protect children from eating raw eggs because they may have Salmonella bacteria in them, we protect children from ingesting (or putting in their eyes, ears, or nose) ingredients which are not safe to do so. Make it clear to the children that when making a mixture in a science activity, there is no tasting. (Mixing in the kitchen is different but there are still precautions to be followed—raw eggs, spicy hot sauce, hot oven.)
Children should wear safety goggles while making these play materials for several reasons:
- To have fun using real science equipment.
- To signal that the mixtures they make are not for eating.
- To protect their eyes from table salt. Children often rub their eyes with their hands and may get scratchy-stinging grains of salt in their eyes, which could cause corneal scratches. Ouch!
Playdough
Ingredients and materials:
- Safety goggles
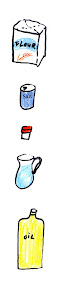 1 cup white flour
- ½ cup table salt
- 2 teaspoons cream of tarter (found in the spice section)
- 1 cup water
- 2 tablespoons of vegetable oil
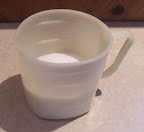
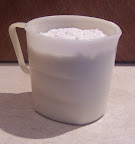
- Measuring cup
- Teaspoon measure
- Bowl
- Wide, shallow pan

- Put on safety goggles.
- Have the children feel each ingredient while discussing it: is it wet? Is it dry? Is it a liquid? Is it a solid?
- Have the children help read the recipe to see what comes next and to measure out all the ingredients.
- Measure out and put all the dry ingredients together in a bowl.
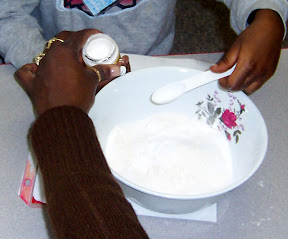
- Mix them together by stirring.
- Measure out and add the water. Stir to mix.
- Measure out and add the oil. Stir to mix.
- Pour into a wide, shallow pan. (Avoid pans with non-stick coatings—salt may damage it.)
- Stir continuously while cooking over medium-high heat until a dough forms, about 5 minutes. Stir and turn over the dough until doesn’t look wet anymore.
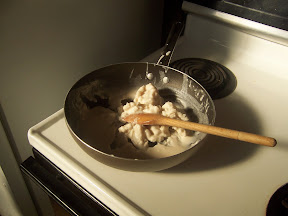
- Remove from heat, and cool. Knead a few minutes until smooth.
- Add color, scent, or glitter if desired.
- Store in a closed container or send some home in plastic bags.
Mixing to make a change is fun, especially when you get to play with the resulting mixture. Your class might want to take their recipe to another class and teach them how to make playdough!
Peggy
Disclaimer: The views expressed in this blog post are those of the author(s) and do not necessarily reflect the official position of the National Science Teaching Association (NSTA).