Science on a Shoestring
Forms of Energy Museum Walk

I use museum walks (also known as “gallery walks”) regularly for different purposes, depending on the unit. Research on learning supports the idea that discussion and group work, including gallery walks, is better than lecture for promoting higher-order thinking skills involving analysis, evaluation, and synthesis. The gallery walk allows students to interact with open-ended questions and use sophisticated terminology. The teacher has the option of extending these activities with written assignments and team-building skills are emphasized. A gallery walk is also flexible (Fluegeman and Rice 2004; Kelly 2004; Wilen 2004; Johnson and Mighten 2005). I like museum walks because students are automatically engaged. They like to be out of their seats, and I love hearing the discussions that are generated as students work, epitomizing the Next Generation Science Standards philosophy of explaining real-world phenomena as they construct explanations and demonstrate their understanding of core ideas. These activities also free me to assess what students already know and simultaneously discover what misconceptions they have.
Recently I developed a museum walk to help students better understand and identify various forms of energy and energy transformations. I use this when teaching about energy and the law of conservation of energy. On entering the classroom, students immediately see various items displayed around the perimeter of the classroom, as well as on student lab tables. These items are all labeled with sticky notes indicating the station number. Students can be heard saying, “Oh cool, do we get to use this stuff?” and, “Yes, we’re doing something fun today!” Knowing that students are already engaged in a learning activity before the late bell even rings is a great feeling and a wonderful way to start the period.
Forms of Energy Museum Walk activity
Prior to the activity:
- Provide instruction regarding the definition of energy, forms of energy, and energy transformations. I use a graphic organizer (see Figure 1 to assist with this and provide students a short guided reading passage, such as the online ck–12 text (see Resources).
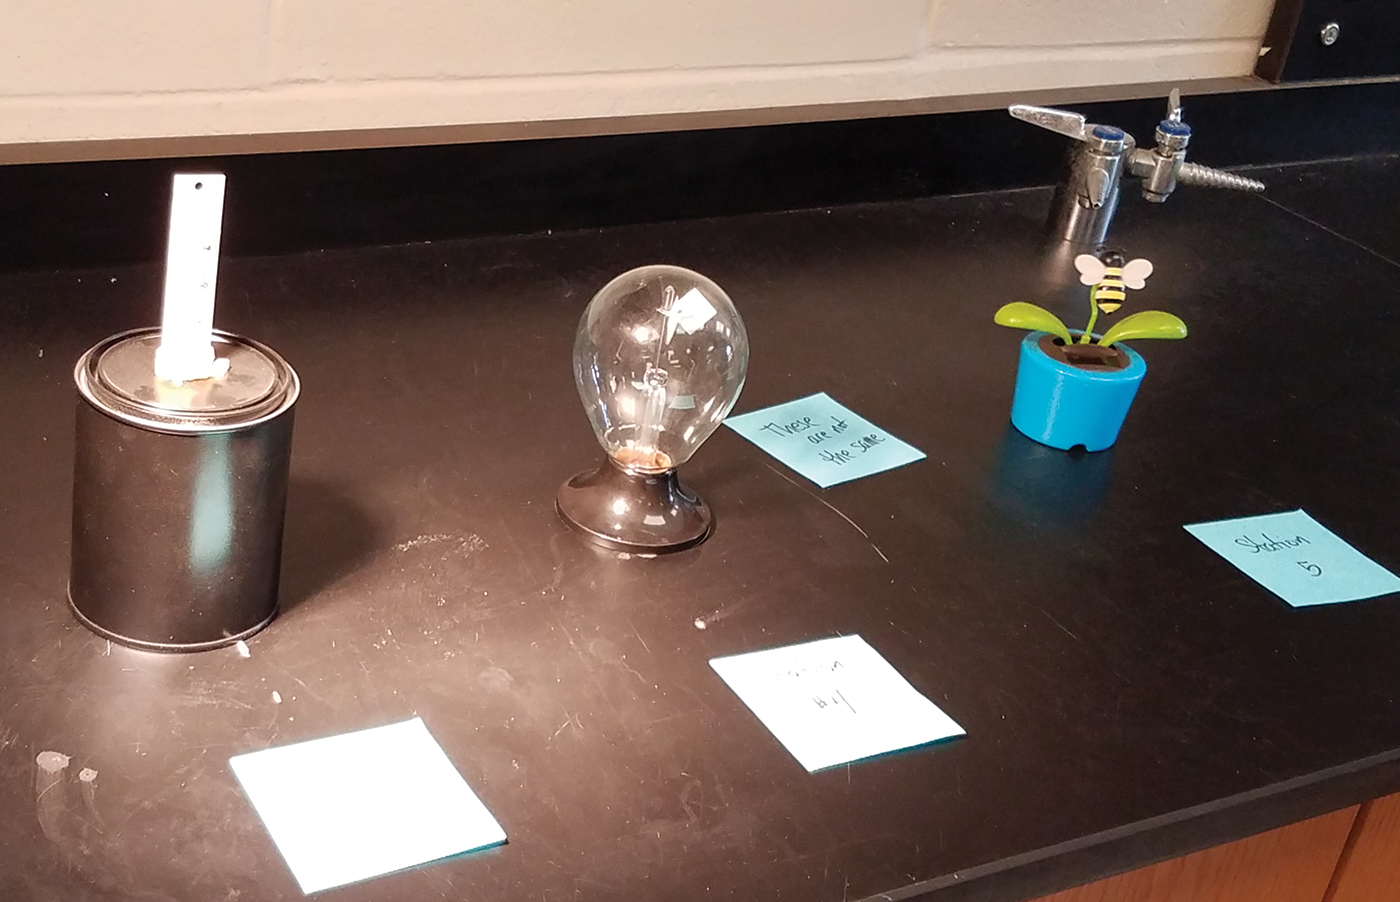
- Gather items that show various energy forms and transformations. (I spent about $20 at a “dollar store” picking up little gadgets.) Items I used included a plasma ball, solar-powered calculator, radiometer (Figure 2), solar-powered bobble head device (Figure 2), heat lamp shining on a black can with a thermometer in it (Figure 2), Bunsen burner (with fake flame), my fish tank in the classroom with little arrows pointing to the fish, the heater, living plants, toy slingshot, unlit candle and some matches (no striker to actually light it), pendulum (a ring stand and a string with some washers attached), cow bell, iPad with attached charger, an apple, a model of an atom, cheap wind-up toys, spring-loaded marble shooter game from a dollar store, clothespin with spring, and my electric three-hole punch. One of my colleagues also did this activity in her classroom and she used some of the same items, but also chose a hair dryer, a radio, an electric fan, and a toy car rolling down a ramp. The possibilities are almost limitless. FIGURE 2: Stations
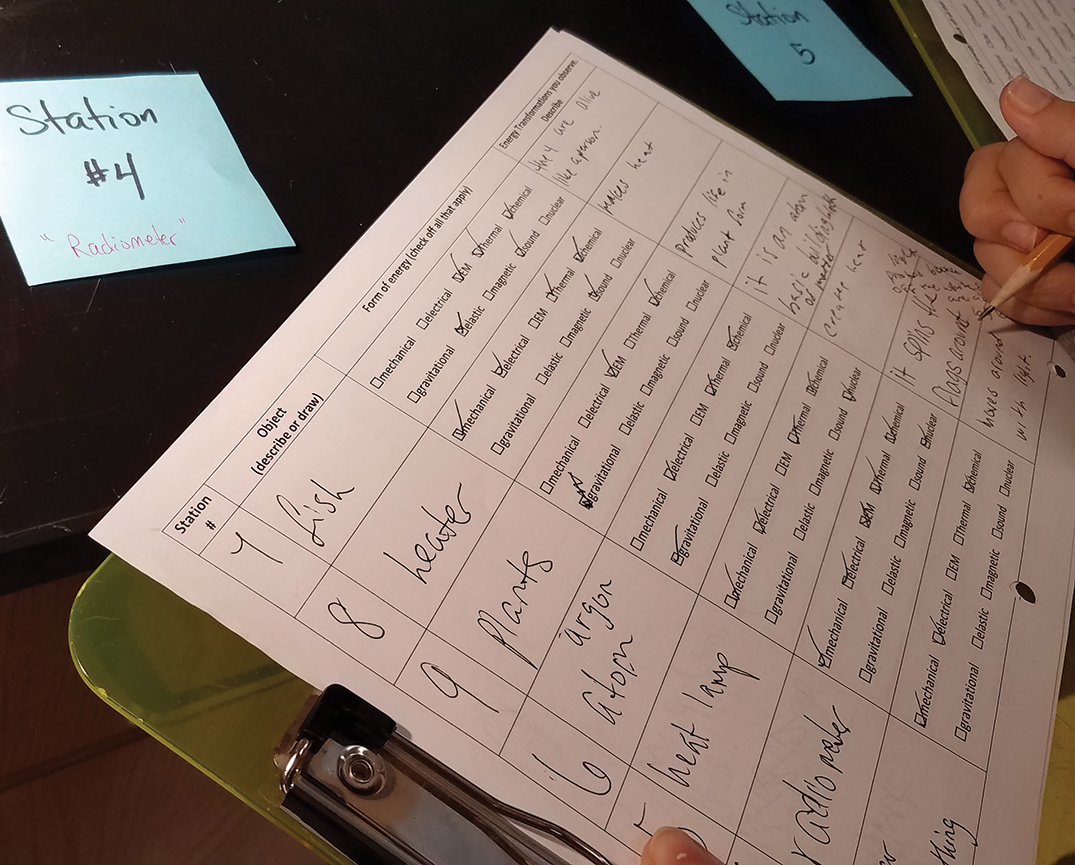
- Set up the objects in your classroom in a way that allows students to easily walk around the room and observe and interact with the objects you have chosen. I set the stations up around the perimeter of the classroom on the counters, as well as along the lab tables. I strategically place potential projectiles in places where I can easily remove the item as students are entering the room in order to prevent possible inappropriate behavior. I use sticky notes at each station to number the station and provide any other information (Figure 3).
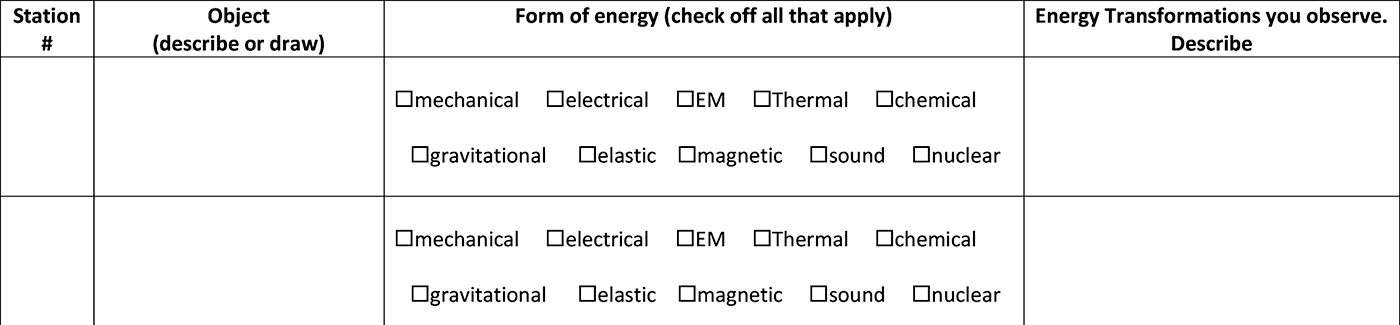
- Photocopy the recording chart and questions you will use as an assessment (see Figure 4 and the Online Supplemental Materials).

The activity
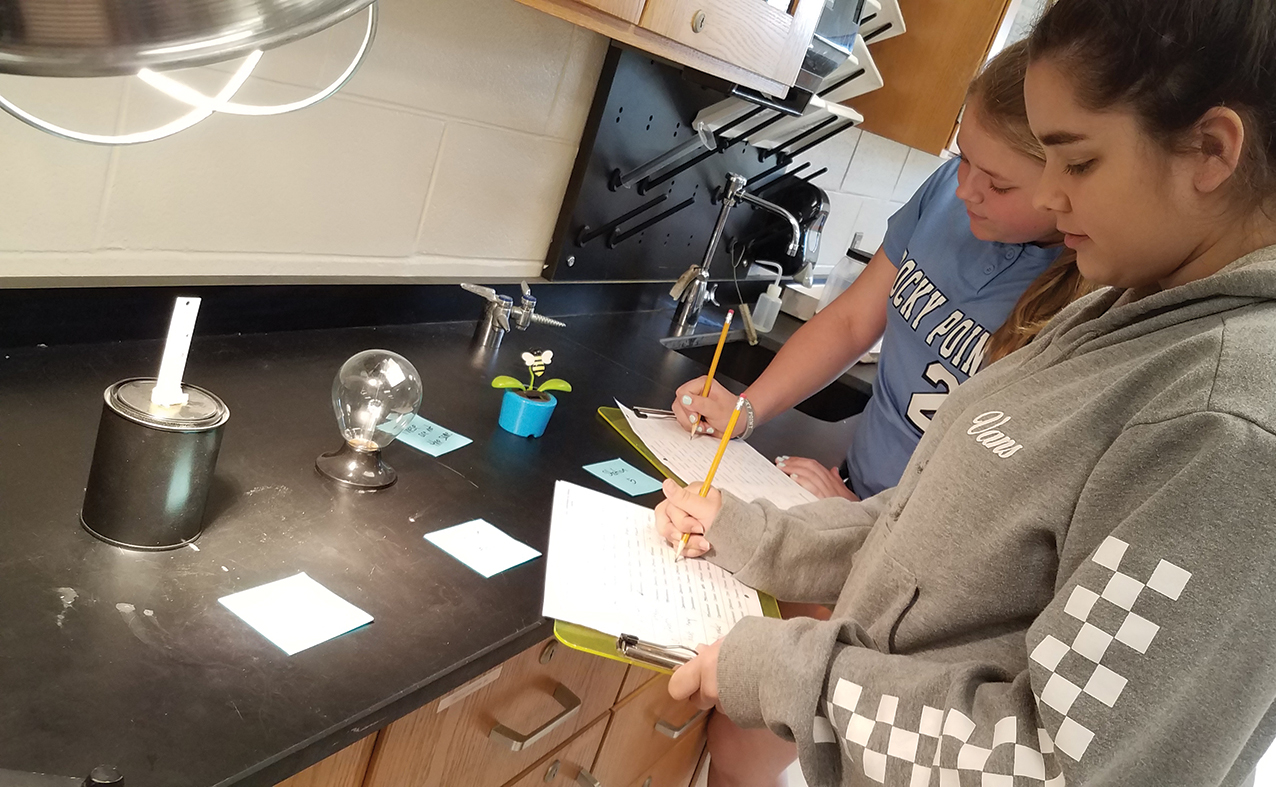
Distribute the recording chart (see Figures 4 and 5 and the Online Supplemental Materials) and clipboards. Instruct students on how to complete the chart. I have students describe or draw the object at each station and check off which forms of energy it uses or represents. Then students describe the energy transformations they observed while using the device.
Instruct students as to how you want them to move about the classroom. I allow students to choose a partner or group of three and move around in whatever order they choose. I tell them if an area of the room is crowded, to move to a less crowded area. I monitor this as students are working. I also tell students how many stations they “must” complete. For example, I had 23 stations set up and required students to do at least 21. You can set up as many stations as you want to either lengthen or shorten the activity, and the activity is easily modified for students with special learning needs. Make behavioral expectations clear, especially if you have never done a museum walk activity with your class before. I allow almost a full 43-minute period for students to go through the museum walk, leaving a few minutes at the end for questions.
Classroom management/monitoring
While students are working, you will have a great opportunity to monitor them. Be sure to circulate throughout the room. This is not a time to be grading papers at your desk! The main safety concern is really monitoring traffic flow for this activity. Sometimes students will congregate in larger groups than you might like. I simply remind students of the expectation that they work with their group and if an area is crowded to move to a less crowded area.
As students are working, I keep my ears open for common misconceptions regarding energy transformations and address them swiftly. Such misconceptions include forgetting thermal energy due to friction in moving objects, not realizing that several transformations can occur simultaneously, and not recognizing that chemical energy in a battery and electrical energy flowing in a circuit are two different things. Taking notes as you monitor students during the activity will help you remember questions or misconceptions that came up. I find that students are highly engaged during this activity and love to play with the “toys.” They are also very thoughtful in their responses and enjoy a higher level of confidence because they are able to bounce ideas off their peers.
Ending the activity/assessment
It is important to allow time to discuss the items at the end of the walk. Have students return to their seats with enough time remaining to discuss pertinent questions. Now is your chance to address questions and misconceptions. You may also choose a few stations to go over in detail to model the “best” answers. Hand out the question sheet, which may be assigned as homework and can be used as an assessment tool. These are the prompts and questions on the question sheet: 1.From the stations you went to, list five items that had kinetic energy. 2.List five items that had potential energy. 3.Choose one of the objects you observed and explain how the object demonstrated the law of conservation of energy when it was in use. 4.If you had to make up a new station for this classroom, what would you choose to use? Come up with your own example and explain which forms of energy it demonstrates.
Typically, I review these questions the next day. This review takes about half the period and ensures that all students’ questions are answered and any misconceptions are addressed.
Ideas for differentiating instruction
ELL students or those with limited language proficiency:
Students can draw pictures rather than describing each object. Check-off boxes simplify the use of proper terminology by providing the terms. You can provide a glossary of terms.
Students requiring extra time:
The activity is easily scaffolded by including some stations that have fewer and more obvious uses of energy and energy transformations, and some that are more challenging with multiple forms of energy and several transformations. Students can be assigned fewer or specific (teacher-chosen) stations to work at if they require longer times due to slower processing or other learning disabilities.
Students who have difficulty following or remembering directions:
Students may be provided with a slightly modified/partially completed chart to model the answering process.
Students with Autism Spectrum Disorder:
If you have students who display difficulty with moving around the room, changes in routine, or loud noises, the chosen stations can include items that do not make noise. The stations that the student attends can be positioned near his/her desk to minimize movement. The autism specialist can be consulted to prepare students for the event a day or two ahead of time.
Heterogeneous ability groupings:
Students can be partnered by ability levels (strong with weak). Both students benefit from this; the stronger student explaining to the weaker student reinforces their own understanding and the weaker student can accomplish a greater level of work with a strong peer tutor.
Advanced learners:
Students can be asked to tie in more information, such as how the object(s) display Newton’s laws of motion, and so on.
Conclusion
After doing this activity and reflecting on it, I was very happy with the results. Students in my classes were highly engaged for the entire period. I liked the activity so much that I shared it with my colleagues, and several of them also did it and reported success as well. The low cost and simplicity of the activity, the high level of student engagement, and the fact that it was so student-centered made this activity a keeper!
Lesson Plans Pedagogy Physical Science Middle School