Walk-throughs
By MsMentorAdmin
Posted on 2009-04-07
Our principal has started doing 5-minute “walk-throughs” in our school. What can she learn from such a brief classroom visit? How should I prepare?
— Rose, Burbank, CA
While principals have always been out and about in their schools, “walk-throughs” or “learning walks” are becoming an accepted strategy to learn more about what is happening inside the classrooms. According to the Center for Comprehensive School Reform and Improvement, a walk-through is a “brief, structured, nonevaluative classroom observation by the principal that is followed by a conversation between the principal and the teacher about what was observed.” A recent (2009) issue of Principal describes walk-throughs as contributing to a “schoolwide picture made up of many small snapshots.” The literature usually describes principals as the observers, but walk-throughs can also be conducted by central office staff, instructional coaches, department chairs, project directors, teachers, or teams.
These brief visits could be seen as checking the vital signs of a school. The principal gets an overview of what is happening in the classrooms across grade levels or subject areas, not just by walking in the hallways but also by stepping into classrooms on a frequent, regular basis. These walk-throughs differ in format and purpose from the formal yearly or biannual observations in which the principal focuses on a single teacher for a longer period of time. Some schools refer to walk-throughs as “visits” to differentiate them from the more summative or contractual “observations.”
You can compare walk-throughs and formal evaluations to your own behavior when students are working in small groups on projects or reports. As the teacher you circulate around the classroom, briefly visiting each group, observing how they work together, checking their progress, answering questions, and providing encouragement and feedback. You probably do not “grade” these informal observations and interactions, but you do learn a lot about your students and what they are doing. When the students have finished their projects, you then formally evaluate the project with a rubric and give a score or grade.
Does your principal communicate whether she is looking for anything specific in her visits? For example, if your school emphasizes strategies such as cooperative learning, writing in the content areas, classroom management, higher-order questioning, or technology integration, she may visit classrooms with these strategies in mind. Most of the principals with whom I’ve worked were not science teachers, so it might be helpful if you and your colleagues helped the principal to understand what to look for in science classes: inquiry, safe lab practices, student engagement in teams, science notebooks, the use of technology, and authentic assessments.
You do not have to do anything special to prepare for these visits; continue your lesson while the principal is in the room. If she does not provide feedback in a timely manner, I would ask her about what she saw and whether she had any questions or feedback.
I know a principal who puts time for walk-throughs in his weekly planner. He views this time as an essential part of his day and visits each teacher several times every month. The key element of walk-throughs is not just doing them, but in the reflective dialogue between the teacher and principal soon after the visit. These conversations can become opportunities to improve teaching and learning.
Our principal has started doing 5-minute “walk-throughs” in our school. What can she learn from such a brief classroom visit? How should I prepare?
— Rose, Burbank, CA
Online forums—communities that inform our practice
By Peggy Ashbrook
Posted on 2009-04-06
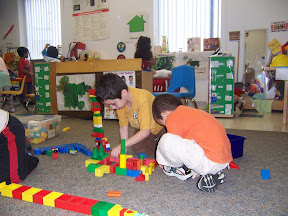 I like to visit other classes and learn what other teachers are doing—but not much time is allotted in a preschool budget for such networking.
Internet forums can serve the same purpose. Viewing teacher’s pages and communicating through online forums broadens my community and improves my teaching. What are your favorite online forums for early childhood teachers—especially those with science content, methods, and concerns—and what do you like about them? What are the characteristics of the forums you like best and those you visit most frequently? Let me know if you think they should be added to the list of links on this site.
Peggy
Feeling vibrations
By Peggy Ashbrook
Posted on 2009-04-05
“Kazoo” is a cool word and playing one is an easy way to ‘feel’ sound. Kids think so too, judging from the comments I hear from parents the day after their children bring home the kazoos they made in school.
Here’s one:
“My daughter took out the special “thing” she made when we got home from school. She put it to her mouth and hummed and showed me how to feel the ‘titation’ with her finger. Then she played with making different sounds—high, low, loud, soft—feeling the different ‘titations’. She was so excited to feel sound. Of course I had to feel it too, about 50 times!”
 It’s so gratifying when children share what they’ve learned with their families. Read how to make vibrations with kazoos in April 2009 Science and Children The Early Years column.
Peggy
“Kazoo” is a cool word and playing one is an easy way to ‘feel’ sound. Kids think so too, judging from the comments I hear from parents the day after their children bring home the kazoos they made in school.
Here’s one:
“My daughter took out the special “thing” she made when we got home from school. She put it to her mouth and hummed and showed me how to feel the ‘titation’ with her finger. Then she played with making different sounds—high, low, loud, soft—feeling the different ‘titations’. She was so excited to feel sound. Of course I had to feel it too, about 50 times!”
Extreme Science: From Nano to Galactic
Classification
By Mary Bigelow
Posted on 2009-03-30
 Classifying Classification describes how a team of first-grade teachers examined their own instruction in classification and how it related to their state standards. Check out the rubric they created and how it could be adapted for older students. They also have a continuum for classification activities: matching, sorting, categorizing, and interpreting. I wonder how many teachers of older students repeat these activities without knowing what the students have done in the younger grades? Are we challenging students along a continuum or doing the same level of activities again and again?
The SciLinks database has some good resources and lesson ideas on the topic at the K-4 level. Websites for the middle grades and high school can be accessed by entering classification as a keyword for lists of websites related to classification systems, classification of rocks, and the basis for classification.
The students’ activities described in Shark Teeth helped them to learn that scientists classify for a purpose. And the authors describe how the students also learned how to use the graphing feature of Excel (with which many adults struggle!). The SciLinks keyword sharks has websites listed for grades 9-12, but you can preview and select any that would be appropriate for your students or as background information for yourself.
We often think of classification in terms of living things, but Does Light Go Through It? shows that even very young children can describe patterns and characteristics. I think that even older students would understand vocabulary such as opaque, transparent, and translucent if they have some hands-on experiences to explore the concepts.
The February issue of Science Scope has a “Classification” theme also. Many of the activities in that issue could be adapted for younger (or older) students. I’ve found that with any of these classification activities, the point is not for students to get a “correct” answer. The real value is in the discussions students have about the similarities and differences of the objects and in the teacher’s guidance through the processes. You can learn a lot by listening and guiding when necessary as students develop their skills in observation, description, measuring, graphing, summarizing via their journals, and making connections.
My experiences at an Orioles game will never be the same after reading What Makes a Curveball Curve. Check out SciLinks for websites describing and investigating the science behind many sports.
 Classifying Classification describes how a team of first-grade teachers examined their own instruction in classification and how it related to their state standards. Check out the rubric they created and how it could be adapted for older students.
Science activities in early childhood prepare for a lifetime of learning
By Peggy Ashbrook
Posted on 2009-03-30
Like learning to count or to read, learning how to do science is a process. Children of all ages benefit from exposure to “science” situations where they are encouraged to fully experience our world, describe what they see, count and record data, ask questions about the experience, repeat the experience, and think and talk about the why of it. If we want children to become life-long questioners and perform well on standardized tests when they are in high school, we need to include science in their early childhood curriculum where direct experience with different materials and an encouraging environment develop their beginning ideas about the natural world and their exploration confidence.
Science activities can be designed to encourage children to make predictions about what they think might happen. Questions such as “What do seeds need to sprout?” “What will happen to this object in water?” and “What is attracted to a magnet?” are common topics in preschool. After seeing what does happen, children can share their thoughts, informally or formally, and record them by drawing, writing, recording on a chart, and dictating. Once is usually not enough for engaging experiences, and repeating the process is part of scientific inquiry. Later that day, the next week or even months later, children will recall what they did and talk about why they think they saw the results that they did.
Today I saw a K-1 class mixing pinches of turmeric, paprika, and dirt into small dabs of egg yolk, oil, and water. (Safety note: Remind the children to keep hands and brushes out of their mouths and be sure to wash hands afterward.) They talked as they worked, noticing differences in all six materials and how the dry powders mixed into the liquids. The objective was to determine which mixture would be most suitable as paint.
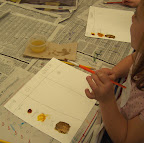
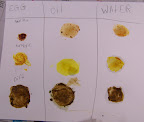
(Click on the photos to enlarge.)
This structured investigation inspired a lot of discussion and wondering. I wonder at what levels the children will use this background to support future learning about differences between oil and water, the composition of foods, and how to preserve works of art.
Peggy
Like learning to count or to read, learning how to do science is a process. Children of all ages benefit from exposure to “science” situations where they are encouraged to fully experience our world, describe what they see, count and record data, ask questions about the experience, repeat the experience, and think and talk about the why of it.
Professional development on a shoestring
By MsMentorAdmin
Posted on 2009-03-30
Our district professional development budget is being drastically reduced next year. Each department has been asked how to provide professional development on a shoestring. Do you have any suggestions for our science department?
–Lisa, Montgomery, Alabama
There are those who suggest that reduced professional development (PD) budgets in many-if not most-schools districts may not be as terrible as many think. Schools may have to reconsider the single events in which a well-knows speaker blitzes in for a few hours, gives a speech, and leaves without any follow-up activities to support the teachers or to determine if anything changes in the classrooms as a result.
Take a look at the National Staff Development Council’s new report, Professional Learning in the Learning Profession. The report summarizes the research on the relationships between PD and student learning and describes how effective PD should
- Be intensive, ongoing and sustained over time, and connected to practice.
- Focus on student learning and address the teaching of specific curriculum content.
- Align with school improvement priorities and goals.
- Build strong working relationships among teachers.
This is your chance to tailor PD to the needs of your science teachers, rather than trying to fit your colleagues into one-size-fits-all events. First, ask your administrator for state or local PD requirements and the district views on independent study and teacher-directed activities. Find out what types of pre-approval and documentation are required for these nontraditional activities.
Then survey the science teachers to identify their needs in content knowledge and instruction. Ask them to examine the curriculum and state standards to identify science topics in which they need background knowledge or cutting-edge topics for which they would like more information. And look at areas in which your students are struggling. Most districts offer general workshops in instructional skills, but you now have a chance to identify specific skills your science teachers need such as inquiry, lesson design, notebooks, formative assessments, laboratory procedures, cooperative learning, reading/writing in science, inclusion, technology, or classroom management. The result of your survey should be a set of goals reflecting the needs of your teachers, PD activities to meet those needs, and a description of how you will chart your progress toward meeting the goals.
You can find or create a variety of free or low cost PD activities: teacher-directed study groups, blogging, action research projects, independent study, presentations by your own teachers (ideally, they should receive a modest stipend), online courses, collaborations with other school districts (including videoconferencing) whose teachers have similar needs, events at nearby museums or science centers, and online collaborations with other science teachers via discussion groups or networking sites. Rather than putting together an extensive list of unrelated events, be sure your activities are connected to your identified needs and goals.
If your district does not have guidelines for personalized PD plans, the NSTA Learning Center has a “PD Plan and Portfolio” tool to guide you through this process, enabling you to record events and evidence and produce a report that can be shared with colleagues and administrators. The Learning Center has other resources for individual teachers or study groups available online:
- Web Seminars: live online discussions (1.5 hours) with content experts and educators from around the world (free and archived for later use).
- Science Objects: online “content refreshers” (2 hours) with graphics and animations on a variety of topics (free).
- SciPacks: online courses (10 hours) that include an assessment, support from a facilitator, ideas for classroom use, and a certificate of completion ($31.99 for NSTA members, $39.99 for nonmembers).
- SciGuides: online teaching resources that include web-based resources, lesson plans, and examples of student work (some are free, others are $4.95 for NSTA members, $5.95 for nonmembers).
The Learning Center also has a searchable list of books, book chapters, and archived journal articles that could be used in discussion groups or for independent study (journal articles and many book chapters are available for free or at minimal cost to NSTA members and nonmembers).
NSTA Communities is a new member resource. You can communicate with science teachers all over the world, share resources, join groups of like-minded teachers, and find educators in your geographical area with skills and knowledge they are willing to share. And you can offer your skills and advice to others.
Don’t forget to work with your administrators to design a format for reporting not just the topic and the hours but also a discussion of how these activities have improved teachers’ content knowledge and instructional skills. Invite administrators to your events and into the classrooms to see the results.
Good luck with your new opportunity! Please let me know (either via e-mail or a comment) if you have questions or other suggestions.
Our district professional development budget is being drastically reduced next year. Each department has been asked how to provide professional development on a shoestring. Do you have any suggestions for our science department?
–Lisa, Montgomery, Alabama
Mixing colors combines art and science in one activity
By Peggy Ashbrook
Posted on 2009-03-29
 Colored acetate sheets make new colors as they overlap. Give children just the primary colors–a dark pink, a blue, and a yellow—and they can create orange, green, purple, and deep grays and browns without any instruction. Like scientists they can share their results with others and repeat the process to see if the results are the same. (The acetate is often sold at this time of year in craft and party stores as wrapping paper.)
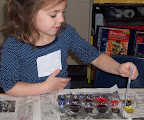
Young children will spend more time than one would expect mixing colored water in a clear container using droppers (pipettes). Highly diluted liquid watercolors create jewel-like colors. The children focus their attention and carefully move small amounts of colored water from one compartment in a clear egg carton to another, creating new colors.
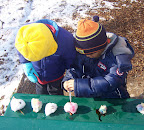 They get just as excited about the grey as they do the greens and purples. They did it and they are so proud! For those schools where snow falls, applying small amounts of colored water to snowballs is another way to mix colors.
Colors can be recorded by dropping onto a paper towel, although they will be much lighter when dry.
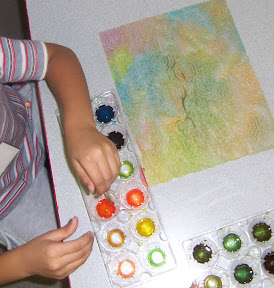
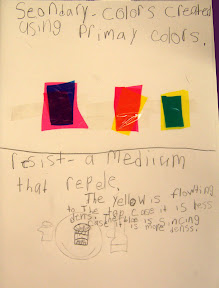
Color mixing results can be part of an on-going science notebook kept all year.
Young scientist-artists enjoy learning that artists used to mix their own pigments and that some recipes do not last well with time (read about Leonardo da Vinci’s paint medium choices for “The Last Supper”). Ask the children to share their “recipe” and explain how you can get that color too.
Peggy

