![]()
![]()
Volume 1, Issue 9
Introducing Youth to STEM Careers
Volume 1, Issue 9
Introducing Youth to STEM Careers
Volume 1, Issue 9
Introducing Youth to STEM Careers
Books Your Young Readers Will Want to Open and Explore
By Carole Hayward
Posted on 2019-01-25
Engaging students in crosscutting STEM concepts is made so much easier when talented storytellers and gifted illustrators produce the kinds of books that young readers immediately want to open up and explore.
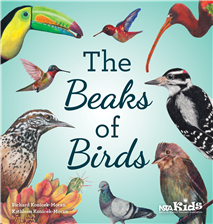 The Beaks of Birds
In Richard Konicek-Moran’s and Kathleen Konicek-Moran’s latest NSTA Kids’ book, The Beaks of Birds, readers are encouraged to accompany Mr. and Mrs. Hernandez on a journey, one that takes them from the back yard, into the park, past a pond, and through the pages of a photo album, to understand how birds use their beaks to find and capture their food, survive, and even defend themselves.
This book will surely help encourage a whole new generation of birders and future biologists as readers are introduced to nearly 20 different birds from house finches, to Eastern wood pewees, black skimmers, glossy ibises and roseate spoonbills, just to name a few. The Hernandezes make this learning fun by issuing the following challenge to readers: Figure out what each bird eats by the shape of its beak, which is also a great way to introduce students to the crosscutting concept of structure and function.
Eight kid-friendly activities as well as lots of fascinating background information are included at the end of the book to supplement learning, both in the classroom and at home. Students are encouraged to do things like examine the shape of a kitchen tool to understand how it helps it do the job for which it was intended; put up a backyard bird feeder and keep track of the different types of birds that frequent it throughout the year and what they like to eat; research an organization that helps protect birds and determine what they can do to help; and draw a picture of a tool they would like to have that would help them do something they want to do.
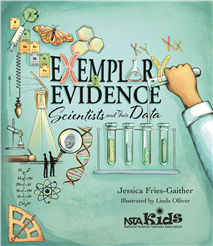 Exemplary Evidence: Scientists and Their Data
Jessica Fries-Gaither uses rhymes in her latest NSTA Kids book, Exemplary Evidence: Scientists and Their Data, to get her young readers to think of science as puzzles to be solved. Illustrator Linda Olliver’s wonderful drawings help bring Fries-Gaither’s whimsical rhymes to life as well as help introduce readers to the work of a diverse group of scientists spanning history to present day. Students learn about the work of Maria Sibylla Merian, Carlos Juan Finlay, and Russell Stands-Over Bull, for example. They are also encouraged to extend their learning beyond the pages of this book by understanding how to collect their own data/find their own answers to how the world works using four easily understood steps.
Exemplary Evidence makes the collecting, organizing, comparing, sharing, interpreting, visualizing, analyzing, and mapping of data fun! In the words of Fries-Gaither:
“The importance of data is shown rather well
by the work of scientists—too many to tell!
Throughout all of history, data’s been key
In the making of every great discovery.”
Learn more about the NSTA Kids series, which are trade books dedicated to nurturing the wonder and curiosity inherent in young minds.
Follow NSTA
 |
 |
 |
 |
 |
Engaging students in crosscutting STEM concepts is made so much easier when talented storytellers and gifted illustrators produce the kinds of books that young readers immediately want to open up and explore.
The Beaks of Birds
Cheater, cheater…
By Gabe Kraljevic
Posted on 2019-01-25
 I consistently see a variety of forms of plagiarism occurring in the classroom. How can I combat this?
– O., Ohio
In real life, group projects do not require individual final products from each team member. So, you could deter cheating on group projects by accepting one work product from each group. Employ a jigsaw approach and require different members complete different sections of the project or lab report.
Try to determine if the cheaters are bullying coercing other students into giving up the answers. This situation requires involvement of the teacher and perhaps administration. Students can easily copy fill-in-the-blank, matching, and multiple-choice assignments. Use them for review or have students complete reflection slips to promote individual thinking. If you have only one or two students cheat on an assignment, you could give them a second chance with different, perhaps more difficult, worksheets.
No matter what strategies you use, make sure to inform your students what the consequences for plagiarizing and other forms of cheating will be. When you receive plagiarized work, you could:
- Return the copied assignments to be done again and designate different questions on returned assignments for each student to elaborate on.
- Call the students’ parents or guardians.
- Record a zero grade for the assignment.
- Select one member out of a group who cheated to receive a grade on the work and mark the others as incomplete. If you select the one who didn’t do the work, the author will likely howl in protest.
- Grade one submission, deduct a 20% “cheating penalty,” and then divide the result evenly among the group.
Keep sharing the message that plagiarism is serious and not tolerated.
Hope this helps!
I consistently see a variety of forms of plagiarism occurring in the classroom. How can I combat this?
– O., Ohio
The Vernier Go Direct SpectroVis Plus Spectrophotometer: A picture is worth 570 wavelengths (Part 1)
By Martin Horejsi
Posted on 2019-01-21
Of all the cool things invented by the universe, light is one of the most amazing. It solves all kinds of problems, can travel great distances with little effort, and its very existence has become possibly the greatest metaphor ever. And on the science education side, light is a critical feature of wave science yet has properties of a particle. And its use is instrumental in the study of just about everything else.
One of the surprising educational contradictions about light is that although we use it to measure, to photograph, to communicate, and of course to see, understanding light requires a disproportionate amount of imagination. One tool that can make the transition from imagination to conceptualization to concrete application is the spectrometer. And I won’t ignore the irony that using a sensor to measure aspects of light that in turn transmits that data with light (Bluetooth radio) to a screen that emits light. A wired USB connection is also possible. And for those students who don’t know what a wire is, there is a fascinating history of the wire on Wikipedia. After reading it, I look at the humble wire with renewed appreciation across time and technology.

The Vernier Go Direct SpectroVis Plus Spectrophotometer is a tabletop solution for measuring wavelength spectrum in absorbance, percent transmission and intensity. While contemplating the various features of the Vernier Go Direct SpectroVis Plus Spectrophotometer, consider the mental gymnastics to have a graphical display of the wavelength absorbance of a material like spinach leaves. Essentially absorbance is what doesn’t reach the sensor in the Spectrophotometer. You can do the math.

The Vernier Go Direct SpectroVis Plus Spectrophotometer talks via Bluetooth with a screen device through a free app called Vernier Spectral Analysis available across the five major platforms of Windows, Mac, Chrome, iOS, and Google Play. The option to run spectrometry analysis with Logger Pro is also possible.
The wavelength range of the Vernier Go Direct SpectroVis Plus Spectrophotometer is from 380-950 nanometers (a range of 570 nanometers hence the article title), and has fluorescence capabilities with excitation at 405 and 500 nm.

Vernier uses this graphic to illustrate the operation of the Vernier Go Direct SpectroVis Plus Spectrophotometer. Basically a known light source heads towards a prism-like diffraction grating then onto a detector chip. A sample is placed in the pathway where light is either absorbed or transmitted. Since the initial light source is known, any wavelengths that don’t make it to the chip are considered absorbed, and any that do make it to the chip are transmitted.

Adding to the reach of the Vernier Go Direct SpectroVis Plus Spectrophotometer is a compatible fiber optic cable that gives up to near point-of-contact readings on all kinds of light sources. The fiber optic cable has a false curvette with an indexing rail for proper alignment. Once the Vernier Go Direct SpectroVis Plus Spectrophotometer is warmed up and calibrated, the cable is inserted and measurements with the open end can be made.

I found management of the cable across general tabletop measurements was helped by a cable holder. I just used one of my many phone cradles with a bit of soft foam to secure the fiber optic under the variable pressure of the tripod mount.


While the uses of the Vernier Go Direct SpectroVis Plus Spectrophotometer seem near limitless, there are some very basic activities that can get the science class started, and quickly, like all phenomenal educational technology, the Vernier Go Direct SpectroVis Plus Spectrophotometer literally disappears as the excitement and wonder of some of the most interesting and insightful science applications literally revolutionize the way we understand and teach about light.

As a classroom teacher, I could draw the simplified electromagnetic spectrum on the whiteboard with my eyes closed. As the squiggly line of wavelengths went from long to short, a special cutout was made magnifying the ROY G BIV the students were already familiar with. From there I would stress what is just above and below Roy, and provide a few hard-to-memorize numbers that quantify what I was drawing.
With special attention to the IR and UV portions of the spectrum, we will actually see those extensions while working with the Vernier Go Direct SpectroVis Plus Spectrophotometer and various light sources. Rarely do light sources stay within the confines of visible light. And some seem to play well far outside the Red and Violet.
At this point I would take a psychophysical detour into how the human eye sees, and sees color in particular. Where I can now use the Vernier Go Direct SpectroVis Plus Spectrophotometer, a new dimension of teaching is possible. I call it Predictive Perceived Color Identification. It all starts with that popular science question of under what color light will plants grow the worst. Of course the inverse is what color light do plants absorb the best, but that is for later since all we have to work with at the moment is a green leaf.

Invarably, a student will suggest that green light is the best because plants are green. Of course in reality, the reason the plant is green to our eye is because the plant reflects the green light rather than absorbing it. Once that mental gymnastic is complete, and the students are clear that green is the worst color, we can move on to other examples such as what color will you see when something red is bathed in red light? Or green light? With the volume turned up on mental modeling of perceived color, we can then warm up the Vernier Go Direct SpectroVis Plus Spectrophotometer and get some values for half of the equation for use in predicting what we will see when we run the experiment.

A great starting point, beyond having the Vernier Go Direct SpectroVis Plus Spectrophotometer on hand of course, is a flashlight with multiple different color outputs. I picked up on from the hardware store for about $20. Colored filter material and a bright white light flashlight will work as well. The next step is to find objects of roughly the same color as the light that spills from the flashlight. I use plastic beads and wires, both often at the hardware store as well.

Wire and Beads under white light
To make this realistic, I generate a backstory grounded in fact. For the beads, I string mostly green ones with the occasional red mixed in. This color sequence represents blood from a wounded animal dripping onto green leaves. It’s actually a more-common-than-not situation for archery hunters, and is the tracking half of the hunting equation. While I skip the physiological implications of an arrow wound, the blood on the leaves is one of the more mild applications for this CSI-like science.
The wires, on the other hand, are to mimic what happens when someone needs to work with electrical wiring in the dark using only a flashlight or headlamp. Since wires are often identified by color, perceiving the color is essential. The problem is that in order to see the color, the wavelengths of that color must be present in the light source in order to bounce off the object and into the electrician’s eye. If you point a colored light or even a white-looking but incomplete spectrum light at colored wires, you may not be able to tell the wires apart. So critical is this that many work lights for the handyman and electrician are near-full spectrum LEDs to provide color wavelengths across the visible spectrum and advertised as such. A lightly scientific but ad heavy explanation for Milwaukee Tool’s TRUEVIEW LED technology can be found here at toolguyd.com’s website.
So here is an example. Study the images and make an educated guess as to what is happening.


Pretty easy, right? So now lets do the same with the spectrum produced by the Vernier Go Direct SpectroVis Plus Spectrophotometer as presented with the Spectral Analysis App. Note that there might be a combinations of colored lights.


Another interesting exploration was with spectrum-specific light bulbs. For instance, on the shelf of a local health food store were some lightbulbs marketed as “Blue Buster!” and the boxes contained diagrams of the light spectrum. I guess we’ll have do our own truth-in-advertising test.


There were two version each at different wattages; frosted and clear, and 60 and 75 watts. The image immediately below is the 60w frosted bulb, and the one below that is the 75w clear bulb.

![]()
One think I noticed is that the clear bulb has sharper distinctions between peaks and valleys. Something that should be expected compared to a frosted bulb. Maybe? In reality, it could be argued that the presence or absence of any particular wavelength of visible light is unaffected by a diffusion coating. Perhaps the frosting is just smoothing the line in the graph. Something important to notice, however, is just how far the Blue Buster bulbs reach out into the infrared spectrum. In fact they easily went beyond the capabilities of the Vernier Go Direct SpectroVis Plus Spectrophotometer as noted by the non-zero line at 950 nanometers. And even worse, there appears to be something happening out at the sub-400 nm UV spectrum. So much so that I’m going to pull out my Vernier UV sensor and get back to work.

As expected with a bulb producing plenty of IR, the Blue Buster got hot rapidly. But there was another bulb that heated up even faster, a bulb marketed as a Bug Light.
The Bug Light produced a yellow light and is designed to avoid those wavelengths that night-flying bugs are more sensitive to. In other words, a bug light should be more sunny or daylight and less evening or nightlight. But the real surprise was confirmed by Vernier Go Direct SpectroVis Plus Spectrophotometer. I discovered it on my own, and that was the Bug Light got very hot very fast. I can see some more probeware research is needed to measure the temperature of these bulbs over time.

The Bug Light has plenty of juice when it comes to the IR spectrum, and also a very strong UV signature. A quick look at that spectral curve and I suspect that bug lights should also repel humans.
To explore the IR and UV spectrum along with what reflects and absorbs UV and IR, well, there are flashlights for that. With dedicated UV and IR flashlights, the only way to measure the “brightness” of the flashlights was with the Vernier Go Direct SpectroVis Plus Spectrophotometer since light is invisible to our eyes the moment you step outside the visible spectrum property line. Here are those flashlight spectrums:


Care must be exercised when using UV and IR-only light sources. Unlike a regular flashlight, you cannot easily tell if the UV or IR light is on. And further, you don’t notice how bright it is because it can never appear bright. Or dim for that matter. So a strong UV or IR light source can cause eye strain, headaches, and disorientation, if not permanent eye damage.

So now when I see interesting light bulbs and light sources, I try to imagine what the wavelength spectrum looks like. And given the rapid evolution of LED lights and light applications, I cannot easily think of a limit to the educational applications of the Vernier Go Direct SpectroVis Plus Spectrophotometer. And we haven’t even started chemistry class yet.
Stay tuned for Part 2!
Of all the cool things invented by the universe, light is one of the most amazing. It solves all kinds of problems, can travel great distances with little effort, and its very existence has become possibly the greatest metaphor ever. And on the science education side, light is a critical feature of wave science yet has properties of a particle. And its use is instrumental in the study of just about everything else.
Ed News: Early An Overlooked Solution for Diversifying STEM
By Kate Falk
Posted on 2019-01-18

This week in education news, educators want Pennsylvania to adopt science standards that help students recognize that science is part of everyday life; low-income students are much less likely than high-income students to complete four years of high school science; new proposed Florida bill would allow school districts to adopt their own academic standards, as long as they are more “rigorous” than the state minimum standards; a bill proposal in Connecticut would mandate instruction on climate change in public schools statewide, beginning in elementary school; today’s mentoring programs in teacher professional development go beyond the basics of helping educators acclimate to the classroom; carefully planned and executed adventures outdoors can give students a positive perspective on learning outside; and new report takes a critical view of fully online courses and competency-based education.
Pa. Educators Want Science Standards to do More Than Teach Students to Win on Jeopardy
Jeff Remington and other educators want students across Pennsylvania to see science as a way to fulfill their dreams. Educators said the state needs to adopt a new set of science standards that helps public school students recognize that science is part of everyday life. Read the article featured on Pennlive.com.
An Overlooked Solution for Diversifying STEM
Colleges can dramatically improve success rates of low-income, first-generation students by working across units, argue Adrianna Kezar and Elizabeth Holcombe. Read the article featured in Inside Higher Ed.
Easing Test Anxiety Boosts Low-Income Students’ Biology Grades
Psychological interventions that improve grades could ultimately help keep more low-income students in the sciences, says Christopher Rozek, a psychologist at Stanford University and lead author of the study, which appears in the Proceedings of the National Academy of Sciences. Read the article featured in Science News.
Education Bills Continue to Mount as Florida Legislative Session Nears
Every year, Florida lawmakers create their legislative wish list of things they’d like to see happening in the state’s public schools. Most never get passed. But it doesn’t stop them from trying. (An effort to require a financial literacy graduation requirement, for instance, is on its sixth go-round.) And this year appears no exception. With committee meetings already under way, several senators and representatives have filed their bills seeking to do anything from increase the minimum teacher salary to $50,000 (SB 152), to require public schools to offer elective Bible courses (HB 195). Read the article featured in the Tampa Bay Times.
Is It Time to Kill Annual Testing?
Ask anyone from a school accountability expert to a parent of a school-age child, and you will get near universal agreement that we have a dysfunctional standardized-testing system in the United States. Educators do not like the annual statewide tests: They inform school penalties, not learning, because the results come so late in the school year. They fail to match any specific curriculum, and generally don’t deeply measure students’ analytical capabilities or the dispositions employers and colleges value. Read the article featured in Education Week.
Teach Kids About Climate Change? This State Might Require It
A legislative proposal in Connecticut would mandate instruction on climate change in public schools statewide, beginning in elementary school. Connecticut already has adopted science standards that call for teaching of climate change, but if the bill passes it is believed that it would be the country’s first to write such a requirement into law. Read the article by the Associated Press.
Why Are You a Teacher?’ Your Answer Should Change Over Time
It’s not uncommon for teachers to find themselves in professional-development sessions being asked: ”What is your philosophy of education?” or ”Why are you a teacher?” We often shrug off this question and give generic run-of-the-mill answers like “I want students to learn” or “To inspire the youth.” But reflecting on your philosophy of education is an essential piece of becoming an effective educator. Read the article featured in Education Week.
Coach Approach to K12 Teacher Professional Development
Today’s mentoring programs in teacher professional development go beyond the basics of helping educators acclimate to the classroom. Mentors must differentiate coaching based on a mentee’s needs, such as help with lesson planning, instructional strategies or classroom management. New teachers credit the programs for boosting morale, while the veterans benefit when programs result in their growth as well. Read the article featured in District Administration.
Outdoor Adventures With Students
For teachers who love nature, hiking a trail, canoeing a local lake, or birdwatching in the woods are peaceful and rejuvenating ways to escape civilization. As a teacher, I want to share my passion for the outdoors with my students. Many students (and the parents or guardians who sign the permission slips) have reservations about experiences outdoors. While students spend time outside at ball fields, playgrounds, and backyards, many have little experience in more natural settings, and this inexperience can create fear. Carefully planned and executed adventures outdoors can give students a positive perspective on learning outside. Read the article featured in edutopia.
Report: Online Learning Should ‘Supplement’ – Not Replace – Face-to-Face Instruction
A new report takes a critical view of fully online courses and competency-based education (CBE) as regulators and stakeholders discuss the topics during the negotiated rulemaking session that kicked off this week. Critics of the report said its outcomes were colored by data from when the for-profit sector was much larger, meaning newer online learning success stories weren’t given enough weight. Read the article featured in Education DIVE.
Stay tuned for next week’s top education news stories.
The Communication, Legislative & Public Affairs (CLPA) team strives to keep NSTA members, teachers, science education leaders, and the general public informed about NSTA programs, products, and services and key science education issues and legislation. In the association’s role as the national voice for science education, its CLPA team actively promotes NSTA’s positions on science education issues and communicates key NSTA messages to essential audiences.
The mission of NSTA is to promote excellence and innovation in science teaching and learning for all.
Follow NSTA
|
|
|
|
|
Barring Reception
By Gabe Kraljevic
Posted on 2019-01-18
 I am struggling with the students being on their cell phones. I was hoping that I could get some advice or tips to handle the situation. – E., Ohio
In my 27-year career, the worst incident I ever had with a student was over a phone.
I didn’t confiscate or park phones like some teachers due to concerns about damage and theft. If you do have such a system make sure that the parents and administration are aware.
Instead, I employed a three-strike rule:
On the first occurrence, quietly tell the student to put away the phone.
For the second transgression, tell the student firmly and clearly to put away the phone and that the student was now on strike two. Strikes remained for the rest of the term, not just that class.
If there was a third occurrence, ask student to wait outside the door until you can have a conversation about using phones. Sending the student to the office is an alternative. In general, the third strike should fix things. After that there is no warning – send them out of class and call home. This is also when you should involve the office if you hadn’t done so earlier.
Be firm about this and never back down. Like an umpire.
Hope this helps!
I am struggling with the students being on their cell phones. I was hoping that I could get some advice or tips to handle the situation. – E., Ohio
In my 27-year career, the worst incident I ever had with a student was over a phone.
Editorial
STEM Careers for the 21st Century
Welcome to the ninth issue of Connected Science Learning! Having spent most of my career building connections and supporting collaboration in STEM (science, technology, engineering, and math) education, I am quite excited about my new role as CSL field editor. I’m grateful for NSTA and ASTC’s vision to create this journal, and for outgoing field editor Dennis Schatz’s guidance and support.
Regarding this issue’s theme—encouraging youth to pursue STEM careers—I find myself reflecting on how the definition of a STEM career has changed since I was looking for my first job. When I was a graduate student in physics in the early 1990s, STEM workforce concerns were focused on the supply of PhD scientists and engineers available to conduct research and development in industry, academia, and government. Twenty-five years later, a STEM career is conceived of more broadly, encompassing a wide variety of jobs and accessible via all kinds of education pathways.
Often, arguments about why we need more young people to aspire to STEM careers are based on the needs of employers, on what is best for the American economy, and on maintaining our country’s competitive edge. Compelling cases are also made for the potential of advances in STEM to drive innovation that addresses world problems (see the Engineering Grand Challenges, for example). The STEM employment sector is growing, and we need the next generation to fill these jobs.
Another important angle, however, is that being prepared for the STEM workforce is good for young people, too. It provides opportunity: There are more new jobs in STEM than in other sectors, and these jobs tend to pay better. More broadly, STEM readies the next generation for the world: Even if they choose another career, youth are prepared to problem-solve, ask questions, learn from mistakes, work with others, and analyze information to make decisions and take action in their life and work.
Encouraging youth to pursue STEM careers is an important theme for Connected Science Learning’s readers. As a community we need to do more to support young people from all backgrounds in believing that a STEM career could be theirs, and to shore up this belief with relevant skills and knowledge. According to the National Science Board’s Science and Engineering Indicators 2018, women currently make up less than 30% of the STEM workforce in the United States, and it’s lower (11%) for underrepresented minorities. Even popular media outlets recognize that a diverse STEM workforce is good for society. For example, articles in Harvard Business Review, Forbes, and Scientific American argue that teams made up of people with different backgrounds and experiences are more innovative and creative and better at making information-based decisions.
The articles you will read in Connected Science Learning over the next three months are similar in overarching goals yet quite distinct by design. I hope that you find interest and inspiration in these efforts designed to help young people build awareness and interest, develop knowledge and skills, and ultimately believe that a STEM career path is theirs if they want it.
Beth Murphy, PhD (bmurphy@nsta.org) is field editor for Connected Science Learning and an independent STEM education consultant with expertise in fostering collaboration between organizations and schools, providing professional learning experiences for educators, and implementing program evaluation that supports practitioners to do their best work.
Field Editor Beth Murphy welcomes you to the ninth issue of Connected Science Learning, focused on encouraging youth to pursue STEM careers.
Field Editor Beth Murphy welcomes you to the ninth issue of Connected Science Learning, focused on encouraging youth to pursue STEM careers.
Rolling from Inquiry into Engineering Design
By Peggy Ashbrook
Posted on 2019-01-15
 Guest blogger Jill Jensen began her 24th year as a science educator this fall. For the past twelve years she has been an Inquiry, Design, Engineering, Art & Science (IDEAS) Coach at Glacier Hills Elementary School of Arts and Science in Eagan, MN. Her current role allows her to partner with classroom teachers to extend and enrich their learning using inquiry, design, engineering, art and science. In this investigation she supports kindergarten students in pursuing an interest in objects rolling down ramps and extends it into an engineering design project improving an objects’ ability to roll.
Follow her on Twitter @GHSTEAMchic and read more about her work on her blog, Jensen’s Jots, at http://ghsteamchic.edublogs.org
What is it about watching objects roll that inspires cheers? As a K-5 science specialist, I’ve helped organize our annual Family Science Night since 2009. I try to have a balance of new stations and previous favorites. One station that remains every year is ‘Ramp Race’: two metal ramps placed side by side with the same number of blocks under each one and positioned about a meter from the wall. Families choose objects from a bin of miscellaneous items to place on the ramp and see which one hits the wall first. As simple as this sounds, it’s consistently one of the favorite stations and typically elicits oohs, ahhs and exclamations.
 It was witnessing this excitement that led me to consider how to build on that enthusiasm. From this informal learning opportunity, I developed a four day mini-unit for kindergarten students that I’m excited to share. At Glacier Hills Elementary, we use an inquiry cycle shown in the picture above to guide our investigations. Our first step is to observe. For this experience, small groups of students are given the following objects: D battery, AA battery, crayon, vial, giant pom pom ball, ping pong ball, golf ball, a wooden circle (similar to wooden pattern blocks), a roll of masking tape and the inside circle from a used roll of scotch tape. The objects are carefully selected to represent a range of sizes, colors, weights and textures. This lesson takes place after teachers introduced three dimensional shapes in math.
For this particular lesson, on the first day, we emphasize the shapes of cylinder, sphere and circle. Groups of students sort the objects by a category of their choice (size, shape, color, weight or texture). Students can also play a ‘guess my rule’ game with their group. To play this game, a student chooses a category, but does not share what they have chosen to their group. The student puts out objects that fit their mystery category and asks their group to guess what category they are showing. After spending so much time observing and describing these objects we move to “I Wonder…”. Some questions include: where did these objects come from, how much do they weigh, how big are they,… and usually someone asks about rolling them. This is the question we explore the following day. This lesson is wrapped up by having students document a category for sorting in their science notebooks with writing and drawing.


We start day two by reviewing the sorting (color, size, shape, texture, weight). We also review our “I Wonder…” question, “I wonder if we can roll these objects?” I prepare the room with eight stations, each with a metal ramp and three wooden blocks. I usually have students work in groups of three or four. Students start by exploring on their own, trying any combinations, arrangements and trials they wish. We come back together for students to share what they noticed. At some point, students mention that some things were good rollers and some things didn’t work very well. This leads to our investigation: to decide as a class which objects are ‘good’ rollers and ‘bad’ rollers. First students have to decide some rules and standards. I propose the following: to be a ‘good roller’ the object has to roll down the ramp and roll one meter on the floor. Standard testing is explained, meaning all the ramps need to be set up the same way (three blocks under one end of the ramp) and that we all need to test the same way (start behind the starting line, no pushing/helping or stopping).
 Students are given a meter stick and an additional block to put at the end of the meter stick to serve as a finish line. I also give students two containers, one labeled YES and one NO. If the object hits the block (reaches the finish line) it goes in the YES bucket. If it doesn’t, it goes in the NO bucket. Once students have tested their items, we come back together to share results. Frequently an object has mixed results, some groups get a YES and others NO. This leads to an opportunity to discuss argumentation in science. Having different results doesn’t mean that one person is right or wrong, it just means different results. However, we do need a class consensus. In this situation I do a do over and we use the results I get from the demonstration. We also discuss that if an object only works some of the time, it’s not really a ‘good roller’ Now what we have our final criteria and results, we share our findings by documenting our results with pictures and words in our science notebooks.
Finally, we start a conversation about the objects in the NO bucket. I ask if there are things we could do to the ramp that might make the objects be a YES. All ideas that students generate are listed on the board. Once we are out of ideas, I go back through the list and share whether I have the supplies and equipment to try their idea. Sometimes it’s an easy test, like adding more blocks to make the ramp steeper. Sometimes I have to do some searching for equipment, like trying a ramp made out of a different material. Sometimes students want to try a different length of ramp or a ramp without sides, all of which I have now gathered after several years of doing this investigation. Sometimes students come up with unique ideas that I would have never dreamed of and I do my best to make it happen. I’ll never forget one year a student wanted to run water down the ramp with the objects, thinking the water will help push the object and carry it down, which it did and that student was thrilled to see it happen.
 Testing out different ramps takes place the following day, giving me time to gather supplies and equipment. When students return, I have new stations set up around the room using as many of their ideas as I can. I have removed the YES items from the bin of objects to test since we know those already work. I still give the YES and NO buckets for students to document their results. Since there are a variety of different pieces of equipment to test, we rotate to each ramp in stations. At the end of class we compare our results and decide which ramps were most effective. Again our findings are documented in science notebooks.
 Our fourth day of investigating is an opportunity to introduce an Engineering Design Process to students. Using the diagram as a jumping off point, I share that engineers start with a problem rather than a question. Our problem is that we have several objects that aren’t good rollers. For the Ideas step, we look back at objects that were good rollers and see if we notice any patterns. To help facilitate our discussion, I’ll hold up the objects we observed the first day and compare them to our NO objects. We particularly pay attention to items that are the same shape. For example, I ask students to consider why the D battery a good roller but the crayon is not? Students are asked to describe how the battery is different from the crayon and how the tape roll is different from the wooden circle.
 After describing the differences between objects, we conclude together that good rollers tend to be wider or bigger and heavier. Next, we think about how to make the NO objects bigger, wider or heavier. Items available to students include: washers, bolts, bottle caps, plastic lids, paper plates as well as bins of several of the YES items (lots of tape rolls and batteries for example). Masking tape and duct tape are also provided for students to attach things. While we are engineering in this investigation, we still talk about the importance of following our science investigations rules (starting behind the starting line, not pushing or helping and that the object has to reach the finish line). We do this because we want to know if their design worked, not because help was given. We also talk about try, try again. If they tried some washers and it didn’t work, try some more. If that didn’t work, try something else.
 It only takes about ten minutes before cheers can be heard, telling me success was found. At that point, we’ll do a quick pause so the student that found success can share their design with the class; scientists and engineers don’t hide their designs from others, they shout their success so others can learn! Yes, there are copycat designs that come next, but there are variations that emerge as well. As with previous lessons, ideas and designs tried today are documented in science notebooks.
This mini unit has come to be one of my favorite experiences for kindergarten students. Students are given opportunities to observe, wonder, investigate, discover, find patterns, draw conclusions, test out their own ideas all while applying math vocabulary and science concepts.
Guest blogger Jill Jensen began her 24th year as a science educator this fall. For the past twelve years she has been an Inquiry, Design, Engineering, Art & Science (IDEAS) Coach at Glacier Hills Elementary School of Arts and Science in Eagan, MN.
Safety Blog
Laboratory Evacuation Training for Science Teachers
By Kenneth Roy
Posted on 2019-01-15
School science labs need to be evacuated in the event of a fire, chemical spill, gas leak, the release of chemical toxins, or other laboratory incident or building issue. The top priority in an emergency evacuation is to ensure all laboratory occupants make it out alive and safe. This blog post describes emergency evacuation planning and training for science teachers.
Getting started
At the beginning of the school year, teachers need to review evacuation procedures with students and a conduct an evacuation drill. In preparation of the evacuation, teachers must make sure exits and aisles in the laboratory are not blocked and free and clear of all trip-fall hazards such as a book bag on the floor. The National Fire Protection Association standards require schools to have emergency lighting and signage at all exits indicating the evacuation route. Make sure students know the evacuation routes and the staging area outside of the facility where the class will regroup after they exit the building. Make sure students know the location of emergency fire alarm pull boxes in corridors.
Evacuation procedure
To plan for an evacuation:
• Have access to an active chemical and biological inventory to provide to the emergency responders.
• Keep the names of trained personnel who work in liaison with emergency responders.
• Have a list of actions to be taken in the lab when the fire alarm is activated (e.g., shut off active flames, turn off electrical equipment).
• Be familiar with the location of engineering controls (e.g., fire extinguisher, eyewash station, spill kits, fire blanket).
• Bring several plastic refuse bags for students to deposit personal protective equipment (PPE) to prevent cross-contamination.
• Know two or more evacuation routes from the building in case the one indicated by the exit signs becomes blocked.
• Set up a staging area outside the building for laboratory occupants.
• Do not re-enter the facility until emergency responders or an administration representative provides notification that it is safe to return.
Building evacuation instructions
• When the fire alarm sounds the science teacher should, if possible, shut off ignition sources (e.g., gas), cover hazardous chemical containers, close fume hood sash, close windows, and turn off all electrical equipment before exiting.
• Make sure students exit the building immediately after the fire alarm goes off.
• If someone becomes injured (suffers a cut, burn, or is exposed to toxins), the teacher might need to seek help from the school nurse, security, or administration officials to remove the injured occupant and secure immediate medical assistance.
• The teacher, who should be the last occupant exiting the room, needs to close the laboratory door.
• All laboratory occupants should exit from the same door.
• Always respond to the fire alarm; never assume it is a false alarm.
• Remove PPE, if possible, before exiting. If not, exit the facility with PPE and once at staging area, roll gloves and goggles in a lab apron and then place them in a plastic bag.
• Be prepared to assist students with disabilities. If students are in a wheelchair or on crutches, proceed to the closest “area of refuge” and call in for rescue help. Do not use the elevator. An area of refuge is a designated location within a building (e.g., a stairwell) specially designed to hold people safely during an emergency. The area of refuge is set aside for situations when evacuation may not be possible or is otherwise unsafe for certain occupants (e.g., students with physical disabilities).
• Stay clear of emergency responders entering the site.
• When outside the building, move immediately to the staging area to take attendance.
• Depending on the severity of the emergency, evacuees may need to move even farther away from the building. Follow instructions provided by classroom teacher, evacuation monitor, or when prompted by administration (usually over the PA system).
Procedures for fires in the lab
If a fire originates in the laboratory, take the following actions.
• Determine the level of the fire. Small and manageable fires can be extinguished by removing the source of ignition (e.g., shutting off gas), and using the appropriate type of extinguisher.
• Fire originating in the fume hood can be extinguished by closing the sash.
• Fires determined not to be manageable require evacuation.
• Pull the fire alarm to signal evacuation.
• Evacuate the building by following the “Building Evacuation Instructions” described above.
• Have a laboratory fire safety compliance checklist to help prevent potential lab fires from starting in the first place.
Chemical emergencies
Mount Holyoke College has an effective plan for evacuations caused by chemical emergencies. In part, their manual states:
Possible incidents are classified into two categories: emergency responses or incidental releases. An emergency response is an occurrence that results, or is likely to result, in an uncontrolled release of hazardous materials that requires a response effort by employees outside the release area or other designated responders (e.g., fire department, clean-up contractor). Situations generally resulting in emergency responses include:
• the release requires evacuations of the area
• the release poses, or has the potential to pose, conditions that are immediately dangerous to life and health
• the release poses a serious threat of fire or explosion
• the release requires immediate attention because of imminent danger
• the release may cause high levels of exposure to toxic substances
• there is uncertainty that those working in the area can safety handle the hazard
• the situation is unclear or data is lacking on important factors.
An incidental release of hazardous materials occurs when (1) the substance can be absorbed, neutralized, or otherwise controlled at the time of release by those in the immediate release area or other laboratory personnel, or (2) a release where there is no potential safety or health hazard.
Submit questions regarding safety to Ken Roy at safersci@gmail.com or leave him a comment below. Follow Ken Roy on Twitter: @drroysafersci.
NSTA resources and safety issue papers
Join NSTA
Follow NSTA
|
|
|
|
|
School science labs need to be evacuated in the event of a fire, chemical spill, gas leak, the release of chemical toxins, or other laboratory incident or building issue. The top priority in an emergency evacuation is to ensure all laboratory occupants make it out alive and safe. This blog post describes emergency evacuation planning and training for science teachers.
Getting started