
Next Gen Navigator
Implementing Storylines: A Meaningful, Effective Way to Practice the NGSS
By Jason Crean
Posted on 2020-03-24
Why is a shift needed?
The science instructional shifts outlined in A Framework for K–12 Science Education and embodied in the Next Generation Science Standards (NGSS) are bigger than a classroom, a school, a district, or even your state. It’s a national imperative to ensure our students will be able to compete globally. My ultimate goal for students is to allow them to become self-directed learners so they can be successful in any situation once they leave the classroom.
It only takes a quick look at social media to realize we live in a pervasively scientifically-illiterate society. For many years, I was frustrated by the emphasis on memorization of facts that were not going to be retained. In NGSS Appendix C, former National Academy of Sciences President Bruce Alberts is quoted as saying, “rather than learning how to think scientifically, students are generally being told about science and asked to remember facts.” We now know students’ building of conceptual understanding of science ideas using the practices of scientists and engineers is what will enable them to find solutions to problems and make sense of our world. This is one of the big instructional shifts that must occur if students are to be prepared for postsecondary education and careers, and has become the focus of my classes, which are completely driven by storylines.
What are storylines?
Storylines are more than just curriculum; they are a pedagogical method that increases students’ ownership of their learning by putting them in the driver’s seat. First, we start with a relevant anchoring phenomenon that elicits student questions about science ideas targeted in the storyline unit. This helps students grasp the need to move to the next investigation, and the next ones after that. I had become accustomed to hearing “Why do we have to learn this?” from students for many years, but with student questions driving the learning, I don’t hear that anymore.
The investigations engage students in three-dimensional tasks that allow them to see how engaging in the science practices and using the crosscutting concepts help them make sense of the science ideas they need to explain the anchor phenomenon presented. These tasks build students’ understanding over time in a way that allows them to make the connections between one lesson and the next. This coherence in learning through using storylines is very different from lesson flow (a logical sequence of isolated lessons supporting a topic), which students are used to. Students engaged in sensemaking through storylines are focused on “figuring out” how the world works, not learning facts, which has increased my students’ engagement and given them the contextualized learning they need.
Disease Storyline
For my biology students, choosing an anchor phenomenon that requires them to build science ideas (disciplinary core ideas) from genetics, evolution, ecology, and cell/molecular biology creates a much more engaging and meaningful experience than having these science ideas siloed in separate units. During the school year, I teach the Melanin Storyline, then the Disease Storyline.
In the Disease Storyline we created through the Illinois Science Teachers Association, we start with a short news story about a teenager who was diagnosed with melanoma. We then have students ask questions about this phenomenon. Having just finished our Melanin Storyline, the coherence of moving to the Disease Storyline is clear: Students use the science ideas they developed in the Melanin Storyline (melanin’s function as a protein and how it is produced in human skin cells) to begin constructing an explanation for this new situation presented to them. Their experience in the previous storyline helps them see that this new phenomenon can be approached using the lens of Cause and Effect (crosscutting concept), which is apparent from the types of questions students ask. This then leads to figuring out why the cells in this young woman’s melanoma are different from her other cells.
I used to teach mitosis and cell division, and cancer was just an example at the end of the unit of what happens when things go wrong. Now I am leading the storyline with cancer and allowing students to figure out what it is through exploring data and other associated phenomena.
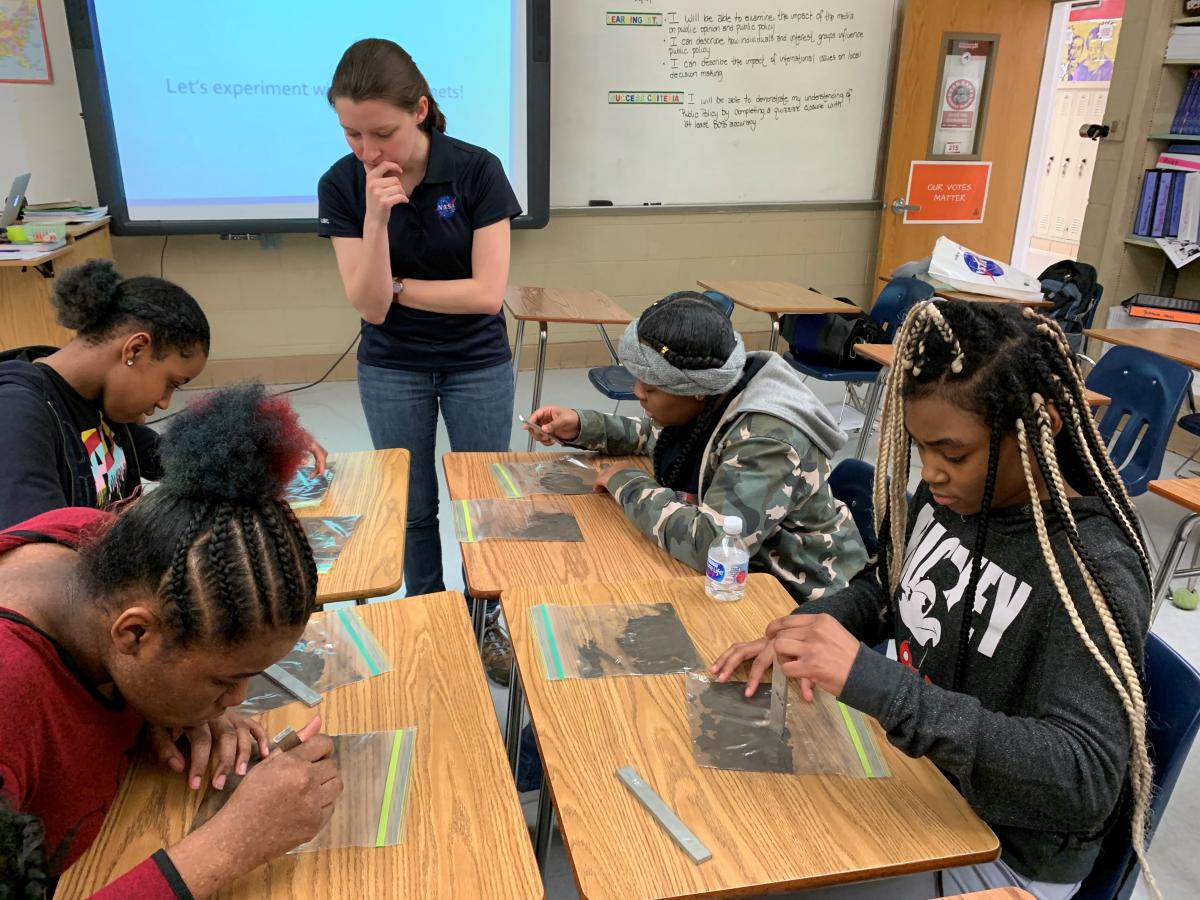
Students begin asking questions that include how the cells in this teen’s melanoma are different from her other cells. Each task then provides students an opportunity to figure out how cancer cells are different from normal cells, which in turn leads them to want to know how cancer cells divide differently from normal cells, which then leads them to figure out how mutations can cause this difference, and so on. This allows students to engage in a host of connected investigations in which they figure out how these processes occur through analyzing and interpreting data, engaging in argument through the use of this evidence, and modeling (see picture). Where I traditionally had student memorize the phases of mitosis, I now have them build models to find patterns and cause-and-effect relationships directly connected to the phenomenon in question.
What does this require from students?

I have found proactive communication with students and parents to be critical, as students who have been exposed to traditional science teaching—especially those students who have been rewarded for “playing school”—may struggle with these instructional shifts. However, these shifts are absolutely critical and necessary for helping them grow as learners. Students who have found success with listening to lectures, rote memorization, and regurgitation of facts may find engaging in storylines frustrating at first. This is to be expected and is completely normal. Even recent studies have found that though students claim to have learned more from teacher-driven instruction, they actually learn more from active learning, which is a central tenet to implementing storylines.
Students need to be engaged in tasks that involve figuring out versus just learning about (active learning over passive learning). This involves collaborative problem-solving, higher-level critical thinking, and productive struggle. Students must understand that the struggle is important! And all of this should be conveyed to students and their parents from the first day of implementation. Parents should understand what this type of classroom looks like and how this transition will allow their students to grow as learners.
In general, once students have worked through their first assessment, they begin to see the value of these shifts in teaching and learning. Overall, I have found that storylines better support students in reaching my overarching goal of their becoming self-directed learners so they can be successful in any situation once they leave the classroom.
NGSS Appendix C can be found at www.nextgenscience.org.

Jason Crean is a science educator, leader of the NGSS Biology Storylining Working Group, and past president of the Illinois Science Teachers Association. He currently teaches at Lyons Township High School and Saint Xavier University in Illinois and has been recognized with the Presidential Award for Excellence in Science Teaching, the Golden Apple, and the AAAS Leadership in Science Education Prize, along with other recognitions from organizations like NSTA. Crean also serves as a consultant for schools, assisting with their NGSS implementation via storylines. Follow Jason via Twitter @drcrean.
Note: This article is featured in the March 2020 issue of Next Gen Navigator, a monthly e-newsletter from NSTA delivering information, insights, resources, and professional learning opportunities for science educators by science educators on the Next Generation Science Standards and three-dimensional instruction. Click here to sign up to receive the Navigator every month.
Visit NSTA’s NGSS@NSTA Hub for hundreds of vetted classroom resources, professional learning opportunities, publications, ebooks and more - and join us for discussions around NGSS at an upcoming conference.
The mission of NSTA is to promote excellence and innovation in science teaching and learning for all.
Why is a shift needed?
The science instructional shifts outlined in A Framework for K–12 Science Education and embodied in the Next Generation Science Standards (NGSS) are bigger than a classroom, a school, a district, or even your state. It’s a national imperative to ensure our students will be able to compete globally. My ultimate goal for students is to allow them to become self-directed learners so they can be successful in any situation once they leave the classroom.
Next Gen Navigator
Storylines Allow Students to Own Their Learning
By Scott Goldthorp and Lauren Pasanek
Posted on 2020-03-24
“I don’t think this data tells us enough; we only know the temperature close to the ground,” Andy* told his peers. “Hail forms in the clouds. We need to know what the temperature is in the clouds.”
The students had just finished several days of analyzing photos of hail and weather station data from various hailstorms across the country and were deciding what to do next. We had a long list of ideas to investigate, and a Driving Question Board (DQB) filled with student questions about hail, storms, seasons, and weather conditions.
This is what it’s like teaching science with storylines: in this case, the OpenSciEd weather (6.3 Weather, Climate, & Water Cycling) storyline. A storyline is a coherent sequence of lessons driven by students’ need to make sense of a puzzling or intriguing phenomenon.
As part of this weather storyline, students first watched videos of crazy hailstorms, recording their “noticings” and “wonderings” to share with their peers. Students then developed initial models to try to explain what was causing these precipitation events to occur. After discussing our ideas as a class, we built a class consensus model to make our thinking visible and develop questions to investigate. We use our DQB and class consensus model to identify possible investigations that will produce the evidence we need to explain the phenomenon or solve a problem. It also helps us see how much we’ve figured out, providing a powerful visual to document and reflect upon our learning.

Student initial consensus models and DQBs
When teaching with storylines, students are driving the learning.
After this discussion about hailstorm data, students had a clear plan of what they wanted to do next: Consider the temperature of clouds high in the sky. So we used weather balloon data to investigate temperature at different heights in the atmosphere. We figured out the temperature decreased as the altitude increased up to 35,000 feet.
However, one student, Josie, was trying to make connections between what we had figured out and she asked her peers, “I don’t get it…why is it warmer on the ground?” She reminded her classmates that the hailstorms we investigated happened in warmer months, not during winter. So we decided to look more closely at sunlight and temperature close to the ground. We compared incoming and reflected light at different ground surfaces and compared the temperatures of the ground to those of the air a few feet above it.
We had intense discussions as we reasoned about what the data meant. At one point, Charlotte stopped her classmates and said, “Wait, I just need some help. Can someone tell me why we’re talking about the ground again? The hail is forming in the clouds.” Then Sheila jumped in, reminding Charlotte that we knew the hailstorms happened in warmer months, and we were wondering if the warmer air or ground mattered and why it was warm. Charlotte accepted her peer’s explanation and built on her thinking: “Maybe it has something to do with the difference between it being really warm near the ground and really cold up high.”
As we make our way through a storyline, navigation routines and strategies help keep our progress visible and help us keep track of what we’ve figured out and where we’re going. One tool we use is a summary table, on which we post a class record of each question we investigate and what we figured out.

Activity Summary Table used to record our progress and keep a public record of our ideas
The students record their personal reflections in their own version of this in their notebooks. Student progress trackers require students to think critically about what we’ve accomplished through our investigations and how to move forward. Returning frequently to our DQB also helps keep our questions in the forefront. Have we answered any of our initial questions yet? What do we still need to figure out?
![]()
Students’ progress trackers provide opportunities for individual reflection.
When teaching with storylines, everyone’s voice matters.
As stated in the Framework, “learning science depends not only on the accumulation of facts and concepts, but also on the development of an identity as a competent learner of science with motivation and interest to learn more” (NRC 2012, p. 286). Teaching with storylines allows students to own their learning. As we build knowledge, piece by piece, each and every student brings unique resources—life experiences, metaphors, culture, and language—to our classroom community. In these first few investigations, Andy, Charlotte, Josie, and Sheila strengthened their identities and interests as science learners through their questions, comments, and willingness to question their peers. Their voiced thoughts sparked discussions among their peers and helped guide the investigations that followed. Using storylines with an intentional focus on equitable science instruction, such as those developed by OpenSciEd, allows all students to build their identities as science learners as the class moves its scientific thinking forward.
* Student names have been changed.
References
National Research Council. 2012. A framework for K–12 science education: Practices, crosscutting concepts, and core ideas. Washington, DC: National Academies Press.

Scott Goldthorp has helped many students and teachers gain a deeper understanding and appreciation of science and mathematics as a teacher and K–12 District Supervisor of Curriculum and Instruction in Cherry Hill, New Jersey. He has been recognized by the National Museum of Mathematics with the Rosenthal Prize for Innovation and Inspiration in Math Teaching and was a New Jersey state finalist for the Presidential Award for Excellence in Math and Science Teaching for secondary science. Goldthorp currently serves on the executive board of the NJSTA as the retiring president and is NSTA District IV Director, connecting science educators across New Jersey, Pennsylvania, and New York. Connect with Scott on Twitter @scottgoldthorp.

Lauren Pasanek is a sixth-grade science teacher in Haddonfield, New Jersey, where she serves as a teacher leader for her district. This is her second year as an OpenSciEd pilot teacher. Before moving to New Jersey, she spent 10 years teaching science in Philadelphia, Pennsylvania, and collaborating with other teachers as part of the Master Teacher Initiative. Pasanek holds a master’s degree in integrated science education from the University of Pennsylvania and is a National Board–certified teacher. Connect with Lauren on Twitter @Lpasanek.
Note: This article is featured in the March 2020 issue of Next Gen Navigator, a monthly e-newsletter from NSTA delivering information, insights, resources, and professional learning opportunities for science educators by science educators on the Next Generation Science Standards and three-dimensional instruction. Click here to sign up to receive the Navigator every month.
Visit NSTA’s NGSS@NSTA Hub for hundreds of vetted classroom resources, professional learning opportunities, publications, ebooks and more - and join us for discussions around NGSS at an upcoming conference.
The mission of NSTA is to promote excellence and innovation in science teaching and learning for all.
“I don’t think this data tells us enough; we only know the temperature close to the ground,” Andy* told his peers. “Hail forms in the clouds. We need to know what the temperature is in the clouds.”
The students had just finished several days of analyzing photos of hail and weather station data from various hailstorms across the country and were deciding what to do next. We had a long list of ideas to investigate, and a Driving Question Board (DQB) filled with student questions about hail, storms, seasons, and weather conditions.
Next Gen Navigator
Teaching and Learning Through PBL-Informed Storylines
By Emily Miller and Mary Modaff
Posted on 2020-03-24
The kindergarteners waited excitedly outside the door, anxious to see the toys my third graders created for them. My third graders were equally excited to share their toys and use science ideas to explain how their toys moved. The engagement and enthusiasm demonstrated by my students during this science unit on forces and motion were just two of the factors that changed my attitude and beliefs about science instruction in elementary school.
Science hasn’t always been my strongest area of instruction. I used to review our curriculum with its predetermined conclusions, cross my fingers, and hope our experiments produced the desired outcome. That changed with the introduction of the Next Generation Science Standards (NGSS), Project-Based Learning (PBL), and a focus on student discourse.
The discourse supports embedded in the PBL units help place students’ questions and science ideas as the drivers of sensemaking: This is a key feature of storylines. This new science focus also incorporates the use of literacy and math skills in a real-world context, helping students find answers to questions about the world in which they live. For the first time, authentic problems allow students to apply math.
I have found my students’ engagement in science and my enthusiasm for teaching science have increased significantly over the past few years as a result of implementing this new approach of students developing and building on science ideas over time. Instead of questioning my personal knowledge and science teaching strategies, I’ve found that I am comfortable posing a driving question and having the students explore from there. I’m not as concerned about getting to the right experimental outcome and trying to fill their heads with specific content knowledge. Students are able to question, observe, discuss, investigate, and experiment to explore science phenomena, rather than do an experiment to see if they reach the correct conclusion.
We are currently using a PBL curriculum developed by Joe Krajcik and his team at the CREATE for STEM Institute at Michigan State University. Each unit we do has a driving question that piques the students’ interest. The question “how can we design fun moving toys that other kids can build?” drives our investigation on forces and motion. Children build movable toys using primarily recycled items (used milk cartons, water bottles, and so on). It is by using these toys that many of their investigations take place.
Students learn to apply ideas about pushes and pulls, balanced and unbalanced forces, friction, and magnetic and electrical forces by describing how they impact the movement of their toys. They also become engineers when planning, designing, and making changes to their toys. They share their first toy models with a group of kindergarteners, then share their final designs with the same group at the end of the unit. This final showcase of toys is a rewarding experience for my students and a fun time for the kindergarteners, who play with the toys.
How did we get here? We started with the driving question, using a rocket to engage with a familiar phenomenon: the predictable arc of the rocket’s path across the length of our classroom. Students made claims about what is predictable about motion, then used measurement as evidence to support those claims. Finally, they engineered a change to that motion using magnets, static electricity, or an innovative car design.
For example, students predicted that additional weight taped to one side of their car would change the direction of motion, and that adding magnets would impact the balance of forces. Throughout the investigation, the students understood that they knew a lot to begin with, and they also were knowledgable about how toys move. They started the unit with their own expertise and their experiences using these moveable toys, which led to more questions and further investigations.
They didn’t need to rely on me to answer their questions. They were able to discover many of the answers through their own investigations, observations, and research. And in the end, my third-grade students become teachers themselves by showing and explaining their discoveries to the kindergarteners. Storylines describe this arc as a projection of learning.
Storylines are essentially the learning trajectory of Project-Based Learning. They initially began before the NGSS with an innovative middle school curriculum funded by the National Science Foundation in the 1990s. They are PBL road maps that predict student curiosity and incorporate students’ prior understanding of the world. PBL storylines anticipate how to start with students’ interests and extend learning as a trajectory that places students’ questions at its center.
These CREATE for STEM units from Michigan feature storylines that have a unique aspect: They allow for, even embrace, flexibility in enactment because the contexts can’t always be anticipated beforehand. For example, I taught this unit at the same time that many students were playing on ice and snow outside at recess. I needed to adapt the unit to incorporate questions about sliding on surfaces.
I think of PBL storylines as the banks alongside a river. The banks constrain movement of water as the river flows. Along the way, the river has deep and shallow stretches, and bends and inlets, and moves more quickly and more slowly as a result of the changing topography. While the storyline moves us forward, the flexibility of the units allows me to respond to my students’ needs. Using the NGSS with storylines has taught me how to be a better science teacher and continues to strengthen my students’ foundation in science as I use their questions to drive the instruction.
The PBL curriculum was part of a research project funded by Lucas Educational Research (http://www.lucasedresearch.org).

Emily Miller is a research associate and professional learning facilitator for schools across Wisconsin. She co-wrote Appendix D of the NGSS, and participated in the development of the NGSS as a member of the writing team for elementary performance expectations. Miller believes it is possible for teachers and students to enjoy teaching and learning science, especially by promoting creativity and active sensemaking, and that moving classrooms toward more equity is both enjoyable and deep learning.

Mary Modaff is a third-grade teacher in the Madison (Wisconsin) Metropolitan School District. This is her fifth year teaching science using the NGSS. She has also provided professional development on the NGSS and the CREATE for STEM Science Curriculum to other elementary school teachers in the Midwest.
Note: This article is featured in the March 2020 issue of Next Gen Navigator, a monthly e-newsletter from NSTA delivering information, insights, resources, and professional learning opportunities for science educators by science educators on the Next Generation Science Standards and three-dimensional instruction. Click here to sign up to receive the Navigator every month.
Visit NSTA’s NGSS@NSTA Hub for hundreds of vetted classroom resources, professional learning opportunities, publications, ebooks and more - and join us for discussions around NGSS at an upcoming conference.
The mission of NSTA is to promote excellence and innovation in science teaching and learning for all.
The kindergarteners waited excitedly outside the door, anxious to see the toys my third graders created for them. My third graders were equally excited to share their toys and use science ideas to explain how their toys moved. The engagement and enthusiasm demonstrated by my students during this science unit on forces and motion were just two of the factors that changed my attitude and beliefs about science instruction in elementary school.
NSTA Reports
Life Skills, Literacy, and STEM
By Debra Shapiro
NSTA Reports
Transforming to a Successful STEM School
By Jo Anne Vasquez, Michael Comer, and Jen Gutierrez
NSTA Reports
Teaching the Science of Honeybees
By Debra Shapiro
Like the other 11 books in the bestselling Uncovering Student Ideas series, Uncovering Student Ideas About Engineering and Technology does the following:
Like the other 11 books in the bestselling Uncovering Student Ideas series, Uncovering Student Ideas About Engineering and Technology does the following:
—from Chapter 1 of Novel Engineering
This book will both introduce your students to an exciting integrated curriculum and support you as you use it in your own elementary or middle school classroom.
—from Chapter 1 of Novel Engineering
This book will both introduce your students to an exciting integrated curriculum and support you as you use it in your own elementary or middle school classroom.
Ask a Mentor
Wordsmithing
By Gabe Kraljevic
Posted on 2020-03-20
 How do you keep students from losing attention when you’re teaching difficult science terminology?
—M., Iowa
Regardless of the grade, you should approach science vocabulary just like teaching another language. It is very important that you teach new words in context. Connect the term to what it describes and use it as needed. You will lose students’ attention if you give them a list of words to define before you start teaching them the concept. I encourage you to look at the glossary of your textbook—I find many of the definitions unintelligible.
Start small by introducing a few terms as you need them, reinforcing them often. A word wall, where you add new words as you introduce them, can be useful and fun. Have students verbally practice the terminology as much as possible in discussions with their peers. Many games reinforce vocabulary, such as one of my favorites, Word of the Day—in which students cheer or otherwise celebrate when they notice a new term.
You can dissect words to show students the many common suffixes, roots, and prefixes in science terminology. It may help them piece together an unfamiliar term or at least get the gist of it. “Rhinitis” may trigger a student to put together “rhino-“ and “-itis” into “horn swelling”, which is not far from the stuffy, runny nose it describes!
Don’t forget to review terms from previous lessons.
Hope this helps!
Image by Wokandapix from Pixabay
How do you keep students from losing attention when you’re teaching difficult science terminology?
—M., Iowa